I've joined the Marie Kondo craze, although in my own defense I must say that the urge to clean out and tidy-up hits me every year in January. The shelf liners in my kitchen cabinets are now clean and everything is organized. All the canned goods are on turntables and each turntable has its own theme. Jam. Tomato. That kind of thing. I LOVE doing this.
Tidying the living room yielded a Featherweight in a case hiding under a pile of sewing projects. This machine is supposed to be ready to walk out the door at a moment's notice but I remembered that it needed some minor attention. Good time for a few upgrades too. And lo, a blog post was born.
The first thing I did (but did not photograph) was to swap out the original Singer button motor controller (aka foot pedal) for a modern electronic controller. This is a super easy thing to do. Let me know if you want to see it in a future post.
I prefer a knee lever and the button controller works beautifully with a Singer knee lever. But I hate using them as a foot pedal.
The wiring on the Featherweight was in excellent condition except for the insulation missing from the end of the original plug. Swapping the plug is another easy thing to do.
Older wiring was much thicker than modern wiring so you have to be careful when buying replacement plugs. The ordinary modern ones just won't fit over the old fat wires. In the past I have found that the plugs made for vacuum cleaners fit. This time I found a nice reproduction antique electrical plug on Amazon. I'm not fussy about whether the electrical plugs on my machines look period appropriate or not, but neither do I mind that this one looks great.
The light bulb was burned out, which gave me a chance to upgrade to an LED bulb. I have bought them before from Stitch All The Things. In fact, I already had several of these on hand, purchased 4 years ago and subsequently lost in the chaos of my "workroom". Which is in the most desperate need of Marie-Kondo-ing. I found my box of light bulbs about 4 days after the new ones arrived, of course. I had completely forgotten than I had already some LED bulbs. I'm sure this kind of thing never happens to Marie.
FYI Stitch All The Things also has two sizes of screw base bulbs. As usual no one is paying me to tell you about this.
 |
| Nice bright LED in there now! |
In another upgrade I added a thread stand, bought from Nova Montgomery. You may think that the rest of this post is a paid advertisement for Nova but again, no one pays me. It's just that Nova has some cool stuff.
The thread stand sits in one of the oil holes and allows you to use one of those giant thread cones sitting behind the machine.
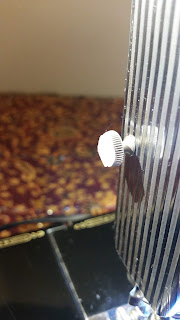
Nova also sells little bumper dots to stick onto the screw on the front plate of your Featherweight. This keeps the extension table from bumping into that screw when the table is folded up.
I also bought some motor lube from her. She makes extravagant claims for it which I can neither confirm or deny but I can tell you that it comes in secure packaging and with a pinpoint delivery system.
And before we leave the subject of Nova's cool stuff, I have her seam guides on several of my machines
It comes with two little screws and an allen wrench. Don't worry, she will sell you more screws or another wrench if you lose them.
My Featherweight is kept packed and ready to walk out the door to a workshop or a weeks long stay in a hospital rehab unit (there were previous posts about this after knee and hip surgeries).
I've had this Stanley wheeled tool box for several years but apparently it is still available. It breaks down to three compartments. I use the top one for materials and supplies for whatever project I will be working on.
The shallow tray is big enough for all the tools, thread. and bobbins. And my own checklist. Because organizing things and making checklists is SO MUCH FUN.
The bottom box holds the Featherweight, mostly invisible in the photo below underneath all the other stuff that fits in there.
And below is all the other stuff that fits in the bottom box.
I had a travel iron in there but recently swapped it out for an Oreck cordless iron, which seems like it might be useful in a workshop setting. Or maybe not. I bought this one at a thrift shop, so no link to the site where I bought it!
BTW if you want an iron to last, don't put water in it, use a spray bottle instead. The shallow tray also has a small spray bottle for this purpose. I do have one steam iron in the studio that I do put water in, but for most purposes I use spray bottles of water.
All of these fit into the bottom box: the Featherweight, it's motor controller, the iron, an extension cord, an Ikea Jansjo light, a vintage Singer zigzagger accessory, and a very cool fold up ruler (another thrift store find).
The only other necessary thing for a getaway sewing binge just doesn't fit into the case: An Omnigrid folding sewing and cutting mat. I made a couple of attempts at making something like this but finally just gave up and bought one. Sometimes that's just the best tbing to do!
Have Featherweight, will travel!
Do you have any "ready to walk out the door" sets? Maybe for handwork? Or another sewing machine configuration? Let us know in the comments below.


