Saturday, June 29, 2013

Lust and Regret: The Belvedere Adler


Object of Desire:  Belvedere Adler.  Spoiler alert:  The story has a sad ending.


WW8:  Fascinating to be able to watch everything working


I buy machines all the time and for lots of reasons. Sometimes I just feel sorry for them. There they sit, all sad and pathetic, and I know that if I don't take them home they will end up in the scrap yard. Sometimes these turn out to be wonderful machines. The Wheeler & Wilson's No. 8 was one of my all time best-buys.


Sometimes I want to save other people from them. That's how I ended up with three Singer 285s. The first one was a gift, and I was thrilled to play with it and examine its funky drive train. 

There was NO EXCUSE for buying the next two. None. But I was afraid some nice young person would come along and think "wow, what a cute vintage Singer" and ruin her life. 


Singer 316G, an enduring love affair


Sometimes I just fall madly in love. Madly, passionately in love. And usually this works out.


But not always.


In a two week period I acquired not one but two Adler Belvederes (or maybe it is Belvedere Adler). 

I would not even call this love---it was lust. Primal lust. This machine is the epitome of postwar coolness. Look at the space age silhouette. 


Look at the gleaming chrome. Look at the awesomeness of the dials. It should be in a movie set.

In a movie set, but NOT in a sewing room. 

Yes, it looks all postwar strong, and it is the usual horrendous weight of cast iron machines. I've been trusting unknown machines based just on the weight. This time that did not pay off. 

This gorgeous machine has a serious, life threatening defect: a geared plastic component just waiting to break. 


Of my two Belvederes, one of them is fine—so far. The other one is now a straight-stitch only machine because a gear deep inside has a big section of missing teeth.

I will be listing the working one for sale later, and the ad will link back to this posting. I'm a full disclaimer seller. The price will be low. We've got a nice movie industry here in North Carolina. Maybe someone will buy it for a movie set.


Saturday, June 1, 2013

Frankencranky and the Spring TOBE

Sounds like the title of a children's story, doesn't it?

Frankencranky's story is below

One of my friends from the quilting guild has expressed interest in getting a 3/4 size hand crank for her granddaughter.  So I've been digging out all the possibilities and fitting them up with hand cranks.  Sometimes I like to have a theme for my sewing machine tinkering and this fit my mood nicely.
Singer 185.  Handcrank and spoked wheel painted with Krylon Celery.  A good match for the nose plate, not really visible here.


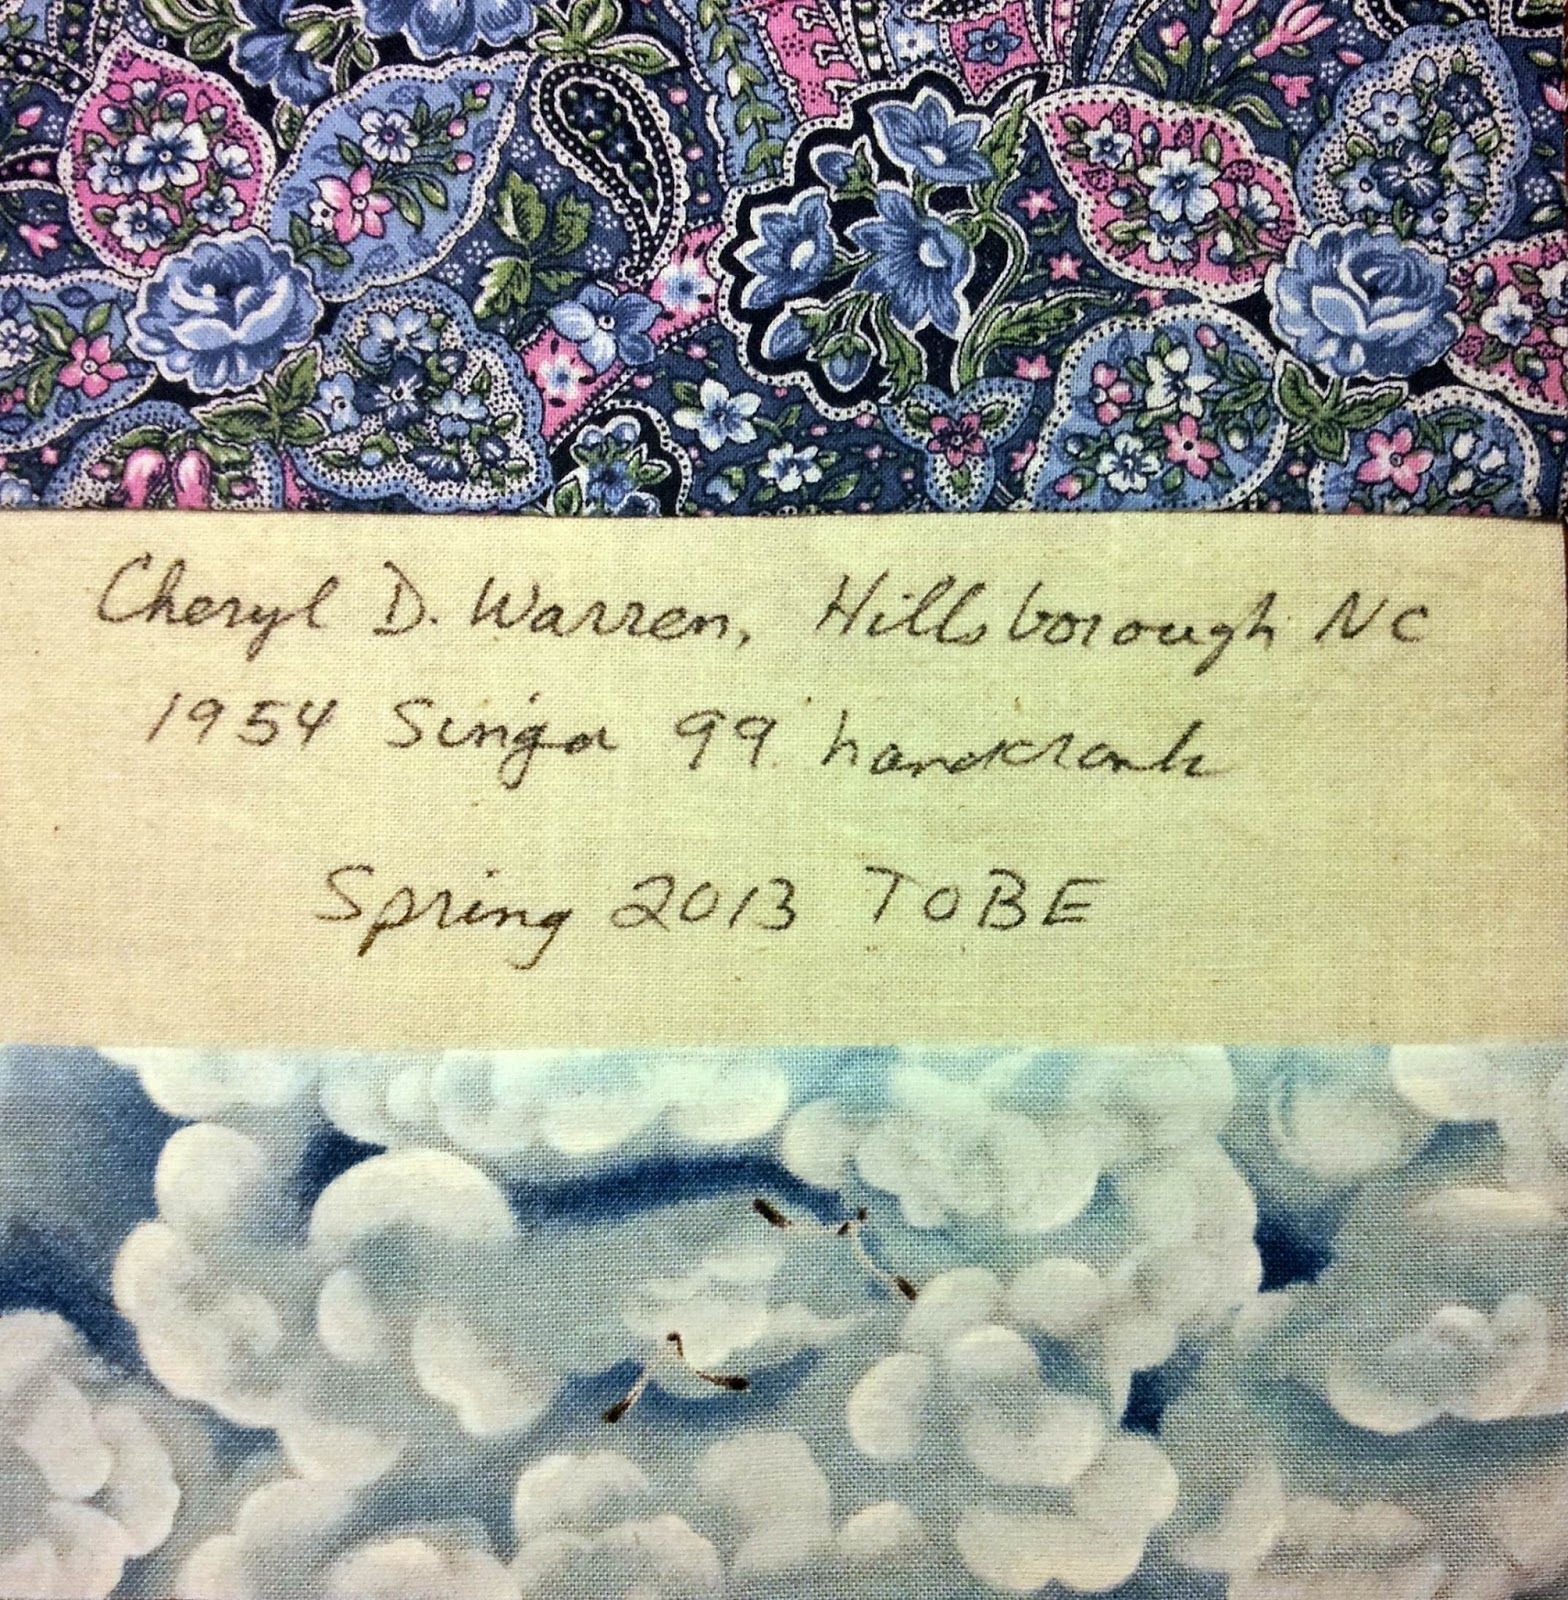
Simultaneously, it was time for the Spring TOBE:  Treadle On Block Exchange, in which we exchange quilt blocks signed with our names and towns and machines.  Very cool.  So the test run for each machine was a set of TOBE blocks (6 blocks in a set, which is what you get from the WOF, width of fabric).  Of course I have to make life more difficult by making one extra block to keep for myself.  Since I buy and sell machines the blocks make nice mementos of my machines that have moved on.

1954 Singer 99


The usual suspects for hand-cranks-for-children are Singers:  the models 99, 192, and 185.  The sewing machine gurus tell us that these are all pretty much the same mechanically.  The 192, labelled "Spartan" was a budget version.  The 185 was the latest one, a two-tone green.  They are all very simple and easy to operated straight-stitch-only machines.  They use the simpler class 66 drop-in bobbin.


Next up on the workbench was one of the luscious jewels of my collection:  a 3/4 size pearlescent aqua 15-clone.  OK, OK, technically it can't be a clone if it is different, in this case smaller.  But in every detail it looks exactly like a Singer 15.  Word on the boards is that these are very rare.

in real life the paint job on the hand crank is an almost perfect match


The handcrank conversion was a piece of cake.  The spoked wheel fit and the bobbin winder still worked with no need for adjustment.  It turns smoothly and easily. 

I lightly sanded and used an auto primer on the black parts of the spoked wheel and the hand crank.  I have an awesome collection of Kia auto touch up paints in little bottles, complements of my local Goodwill store.  I mixed an aqua with some white, and it looks much closer in color to the paint job on the machine than it does in the photo. 


Long time blog readers have seen this National before.  No way to attach a reproduction hand crank, hence the little knob on the handwheel.   That means that you get one revolution per turn, rather than the 3 you get with a geared hand crank.  Tedious does not begin to describe the sewing experience at this pace.  And if that is bad, winding the bobbin is excruciatingly boring.


But the exciting news is that I did get it to sew!  With a little help from the online community, who post photos of threading paths, and send emails with technical details about those obsolete needles.  In this case scooting a regular needle down 3/16" worked a treat.

First time I ever used a leaf tensioner.  Super easy.  The screw regulates the tension.  It works well, too.  Much better than the tensioner on my $800 plastic embroidery machine.


Getting this fully rehabilitated from its original rusted and frozen state was deeply satisfying.  The last piece of the puzzle was figuring out how to wind the bobbins.  I believe that originally the winder would have ridden on the treadle belt.

One of those stretchy rubber motor belts was the perfect solution.  And the gurus tell us not to use them on motors, so I have some that had been removed from their machines.  Never throwing things away often comes in handy.


Pull forward on the winder with your left hand while turning the hand wheel with that knob with your right hand.  Several hours later your bobbin will be wound.  (no, really it wasn't that bad.)


Who might enjoy using this sewing machine?  A small girl who is making doll clothes.  With very tiny seams.  And whose grannie loves antiques and is not intimidated by a vibrating shuttle machine.  Probably nobody else, though.


Once upon a time back in the late 1960's (according to bulletin-board-lore),
Sears advertised a sewing machine for $99 (which was inexpensive for the time).  All metal construction.  The ads were in newspapers, printed in black and white.

Then when the customers got into the store, this is what they saw.

Kenmore 159.11


Garish pink.  Vibrating shuttle (those bullet shuttles that hold the spindle bobbins).  A bobbin technology that had been obsolete for decades (and just like the system on the antique National above).  Sears distributed them to their stores in small quantities.  The point was NOT to sell these machines--the point was to sell the customer something much more expensive. The $99 ad just got the customers into the stores.


I cleaned, oiled and tested this one a couple of years ago.  Except for the Pepto-Bismol pink color (which I actually like) there is nothing wonderful about it.  Fairly crappy machine.  Rattly and noisy.  Mediocre stitch quality.


these appear to be the same size as Singer bobbins, but the hole in the top of the bobbin fits over a post on the bobbin winder
Flashing forward to 2013:  because not many of them were made, they are now rare.  One of these sold on eBay for $211 (plus shipping of course).  Mine is missing a decorative button, which probably cuts the value in half.

Krylon Watermelon on the wheel and crank


The hand crank conversion on this one was a delightful surprise.  I didn't want to notch out the handwheel.  Because it is "collectible", I don't want to do anything that can't be reversed.  I have a stack of handwheels that Augustin notched out for me a while ago, and one of the small non-Singer wheels fit perfectly with the bobbin winder.  The reproduction handcrank fit nicely and it all turns smoothly and freely.  The conversion took less than five minutes.  It is as easy to use as the 185 or the Spartan.

There is still the vibrating shuttle problem though.  It's not really difficult, it is just different.  Most people want a system that they already understand.   And who can blame them? 


Singer 285. 

And I saved the worst for last:  the notorious Singer 285.  Known as the worst all-metal vintage Singer model.

Hammered aqua blue paint finish and cute as a button but with a completely whacky drive train.  Jerky as a result.  With a motor you get all-or-nothing as your speed options (at least on mine).

I wondered if removing the motor and operating it at hand crank speed would result in a good sewing experience.


In a word:  No.  And the six people who receive a Singer 285 TOBE block from me this year should treasure them as rare and wonderful objects because there will NEVER EVER be any more of them.    And nobody other than me would be stupid enough to convert a 285 to a hand crank. 


The problem is that drive train.


It gets to one end and it requires extra force to get it to change direction and get it going back in the other direction.  That's my hypothesis anyhow.


It makes for a bumpy hand cranking experience.  It was hand to hand combat all the way.


The hand crank conversion did not go well.  First, the spoked wheel would not fit, and neither would any of the other notched wheels I had on hand.  Using my rudimentary Dremel skills I managed to cut a notch in the handwheel, only to discover that the finger of the hand crank would not reach it.

I got a big kick out of figuring out how to make it all work.  And hopefully by telling you all about it here, I will save you from wasting your time.  


How to convert a Singer 285 to hand crank

So here's what you do:  First, reconsider the whole project.  Go sit down and think it over.  Have a stiff drink, or a hot bath, or both. Still committed to this path of folly?  OK

Cut a notch in the hand wheel (notch the size of the hand crank finger, natch!).

I used a Dremel tool to cut the notch, and lots of trial and error.  I'm not planning to reveal what attachment(s) I actually used because it was undoubtedly all wrong.

If I ever master the esoteric mysteries of Dremeling, I WILL reveal them here.


Put the hand wheel and clutch knob back on the machine.


Remove the silver colored piece from the back of the finger of the hand crank. It unscrews.  This will allow it to fold down far enough to meet the hand wheel.

 Don't lose that little screw because when this sorry mess is over and you are regretting ever doing this you will want to take the whole thing back apart and reuse the hand crank on a more deserving machine.


Slide a 4-inch hose clamp over the hand wheel and tighten it most of the way down.


Attach the hand crank and slide the finger into the notch on the hand wheel.
Tighten the hose clamp until all is secure.


Sew away!  Feel that thunk at one point in each cycle?  That's the end of the line, literally.


I call him Frankencranky. 

FRANKENCRANKY!


Here are the blocks I made for the TreadleOnBlockExchange.  The photos of them are not really that interesting, but it helps me remember which fabrics I used, so that I don't use them again.

I received lovely blocks in return, from all over the US, and it was fun to get blocks from people I know from the board.  But since each block has personal information on it, I don't think I should show them here.  Thanks to all who participated, and especially the hardworking hostess of the exchange, Marie.


Wednesday, May 8, 2013

How To Get Rid Of A Treadle

I get questions like the ones below from Daphne and thought it might be useful to put my ideas online.  Readers are invited to chime in with their own ideas in the comments section below.

Daphne wrote:
Good Morning!


I stumbled across your blog while trying to find information on a Run Easy treadle sewing machine that I have. Long story short(ish), I came into possession of this machine about 10 years ago when a friend got divorced and moved across country. She couldn't take the machine with her, but really didn't want her ex-mother-in-law to get her hands on it, so it ended up in my care. Fast forward 7.5 years, I'd lost track of that friend, gotten engaged, and ended up moving the sewing machine from GA to NH into my husband's small log cabin. Fast forward another 3.5 years to today where my husband and I are expecting our first child in a couple of weeks and find ourselves crunched for space.


The sewing machine is in pretty good shape from what I can tell. The wood cabinet has gotten a little dried out in our wood stove heated cabin, but I think a very little TLC with a light sanding and oiling is all it really needs. The sewing machine itself looks to be in good working order. The bobbin is still in place (one of the oblong type) and is even still threaded. The belts are still in one of the drawers of the cabinet.


Ideally, I'd love to see this sewing machine go to someone who will love it, take care of it and use it. If you have any suggestions on how to go about doing that, I'm all ears. If not, our town's yard sale day is coming up in two weeks and I will have to put this lovely machine out for sale, so my other question would be - what is a reasonable price for a sewing machine of this age in pretty darn decent condition? I have heard that many people today think that it's great fun to take an old sewing machine like this and gut it for other decorative purposes. I REALLY don't want to see that happen to this beauty. If I can find someone who will take her and love her and treat her right, I'll pert near give her away. Otherwise, at this point I'm planning on pricing her for a pretty penny just to discourage the idiots.


Thank you for any advice you may have!

Well, Daphne, first of all we all appreciate your desire to preserve a possibly working machine and save it from the dreaded fate of being converted into something else.

The economic realities of the law of supply and demand are going to bite you, however.  Supply:  there are literally millions of treadles lingering in parlors, basements, garages, and barns.  People have a sentimental attachment to them and keep them.  People are under the mistaken impression that they are worth something, and they keep them.  People don't know how to get rid of them, so they keep them.  Anyway, they keep them.  And eventually they try to get rid of them.  The supply of these things is ENORMOUS.  Check CraigsList for any major or minor city at any time and you will see them.

Demand is a different story.  A very, very small number of people want to sew with them.  

So:  Huge supply, almost no demand = very low cost.  This surprises all of those folks who spent $300 to $500 on one back during the brief period in the late 70's to early 80's when country decorating was all the vogue.  They absolutely do not want to hear that $30 to $50 is a reasonable price today.

Yes, you heard me right.  For a treadle such as you describe (unknown working condition, brand name nobody has heard of, wood not in perfect condition), you will be lucky to sell it at all.

There are exceptions of course.  If you have a treadle in perfect working condition, with immaculate woodwork, and with a gleaming and glossy sewing machine in it with absolutely gorgeous and intact decals, then $100 is a reasonable price to ask. You might even get it.

There are even some exceptions to this, for very rare and unusual early machines.  I'm not buying in the "collector's" market however, so I can't give you good advice about this.   The fact that I have never heard of your brand name does not mean that it is one of these rare and valuable ones, btw.  It was almost certainly made by somebody else and just badged or labeled with this name.


Oh, and by the way, the prices that people ASK on CraigsList are no guide to what they sell for.  There is no way to track what they actually sell for.  I look at CraigsList every morning, and I know that treadles often sit on CraigsList for months and months.


How about giving it to charity?  Any charity that USES sewing machines needs ones in good working order.  Any charity that SELLS sewing machines will have the same problems getting rid of it.  I regularly make the rounds of my local charity shops, and most treadles in the condition you have described sit for months or even years.  Yes, years.

So, what should you do?  My first advice would be to post a notice on the "treadleon" bulletin board.  This is where that tiny group of dedicated treadlers hang out online.  Mention your specific location.  If you really, really want it to go to a treadler, I would even offer it for free.

If you want to dispose of it at your town's annual yard sale, this is the marketing approach I would take.  Make a big sign saying something like "FREE TREADLE SEWING MACHINE:  APPLY HERE".   Then I would take applications.  Have them write a paragraph describing what they would do with the machine and why they want it.  Then give it to the most deserving person who might actually appreciate it and preserve it for the next generation.

Before you take it to the yard sale, I would also advise that you pick up some sewing machine oil and a treadle belt (I think you can still get them at Joann's) and see if you can figure out how to install it (very simple, and YouTube should help).  Give the machine a drop of oil at every point where metal moves against metal and see if you can get it turning freely.  Oil the treadle irons too.  If people can see it actually moving, you have a better chance of somebody taking it off your hands.

And that is the real point of my advice:  instead of thinking about selling it, think about how to find the right person to take if off your hands.

On the other hand....baby on the way?  any chance you will want to do some sewing in the future?  A nice treadle is a wonderful thing to have in the house.  Nice and quiet, too---won't wake the baby!  And the same group at treadleon will fall all over themselves helping you online.  Think about it!

.........

OK, all of my imaginary friends blog buddies:  please add comments, suggestions, or complete refutations of the advice I have given to Daphne!  And if you know who manufactured the "Run Easy", please let us know.

.........

Daphne wrote back to thank me for the suggestions and to tell me her plans
  • first, try to track down the original owner to see if she wants it back
  • next, to contact a local quilt shop to see if the owners know of anyone who would want it
    • good suggestion---I should have thought of that!
  • finally, contact treadleon
Good luck to Daphne in finding her machine a good home.  Kittens are easier than this!


Sunday, April 14, 2013

HMTATM?* Wheeler & Wilson's No. 8. And two videos!


*How Many Treadles Are Too Many?  Post #3 on this topic.

After a long cozy chat about this machine, you will find videos showing how to thread the upper thread and the bobbin.  Read on down or just scroll down to the familiar YouTube windows.

Best guess on the date: 1878 or 1879, based on interpolating from other people's serial numbers with known sales dates. 

I look at lots of sewing machines online, just as eye candy mostly.  CraigsList and coffee in the mornings.  Shopgoodwill.com.  Sometimes eBay.  I rarely look at treadles anywhere other than CL, but one day I clicked on this machine on shopgoodwill.  It was in a nearby town, the auction was ending that day, and no one had bid.  I got it for $40 without knowing much about it other than it looked older than anything else I had.  I felt sorry for it and wanted to rescue it.

The badge on the bed and the raised No. 8 on the pillar told me that this was Wheeler and Wilson's No. 8.  I shared my score with the folks on treadleon and over the next week an amazing amount of information poured in.

Riley told me that this was the third time it had been listed on shopgoodwill.com.  We have a strict no-mention-of-auctions policy on treadleon, so he couldn't give a shout-out on it.  So maybe I really did save it from the dump.


Bill offered some of the rare needles (but it came with 2 dozen!)

Kevin and Miller provided amazingly detailed technical information about the needles, including advice about what modern industrial needles can be persuaded to work with it.  I have saved every scrap of this information just in case I ever do exhaust my supply of needles.

Phyllis explained the two belt slots in the balance wheel (handwheel) and the flywheel:  one set for speed and the other for slower sewing with more power (for heavy fabrics). She also relayed a statement from a vintage sewing machine guru that this machine was the "Rolls Royce of sewing machines before there was a Rolls Royce."

Shown here with the belt in the outer groove of the flywheel.  Can you see the inner groove?

I used a coil spring steel belt so that I could easily shift the treadle belt back and forth between the wheel slots.

Jennifer and Miller had a conversation about the single rotation hook.  I have read about the different types of hook rotation and have even observed some of them, but confess I have no idea of the significance---yet.  There is always more to learn and I am in no hurry.  Just floating down the stream of sewing machine lore.

color added so that you can see where the take up lever is

Kelly gave me a useful tip about sewing on this machine.  The take up lever, which is on the right rather than the left, is pulled to the left if you remove the material in that direction.  Then when it is free (when you cut the threads) it swings back to the right, taking your thread right along with it---and right out of the needle.    Hold onto those thread tails.


Miller (who has recently helped to found a Wheeler and Wilson yahoo group) provided lots of information.  He told me where to find the serial number.  It had been on a cover plate, now missing, but is also engraved on one of the ledges that holds that plate.  He described the two different bobbin case possibilities and I found that I have the older one.  He gave me a vital tip about the bobbin (thread comes off the bottom towards you). 

The bobbin mechanism was filthy and completely gummed up to the point of being frozen.  No repairs were needed, but I did have to disassemble the bobbin mechanism in order to clean it.  Its always SO satisfying to bring a machine back from the dead. 

I saved all the emails from my treadlon friends in a document, which is why I can remember who said what in such detail.  Sadly I don't remember who pointed me to the link to the pdf of the manual, or where I found it.  This was almost a year ago.


bobbin winder bracket
I also don't remember who explained the bobbin winder to me.  If you go back and look at the pictures above, you will see it with the other goodies.  And if you look at the machine head you will see that there is no place for the bobbin winder to go.  That's because it sits in a bracket on the treadle frame and rides on the flywheel.  It has to have a tire, and the largest one I have will fit but is really not quite big enough and tends to pop off.  But it works well enough to wind a bobbin.


Bobbin winder in bracket, shown without the necessary tire.


 Bobbin winder rests on the flywheel.


Thank you, thank you, thank you to everyone who helped me, those mentioned above and anyone else I forgot to mention.  The unfolding of the story of the machine's characteristics was a lot of fun.


It has glass presser feet, wonderful for sewing visibility.  And an idea that did not come around again until clear plastic presser feet were developed---when?  1970's?  1980's?  Let me know if you know.


and it came with a whole set---every foot mentioned in the manual, although one of them is chipped.


and here is the whole set of goodies.  It would be fabulous is that were a dated receipt, but it isn't.


The machine is fascinating because all of the workings, which on later machines were encased in cast iron, are all out in the open and you can watch it all moving.


I would never have figured out the threading of this machine without the manual.  Even with it, it took me a while.  Couldn't find a YouTube video of the threading of this machine, so I made one myself.  These are my FIRST YouTube videos (cue the horns, bells, flutes and crashing cymbals).


On more modern machines, the tensioner has two discs that move freely, with a spring holding them together.  The more tightly wound the spring, the more pressure on the discs, and the tighter the tension. 


On this machine there are also two discs, but they are fixed together as one piece.  They spin around as the thread feed through. The manual refers to this as the "tension pulley".  There is a leaf spring in front of them.  So how does increasing the tightness of the spring increase the tension on the thread?  My best guess is that increasing the tension slows down the speed at which the tension pulley spins around.

You wrap the thread around the tensioner one and a half times, btw.  That's just one of the things that I could never have figured out for myself.


There is a removeable panel to the right of the machine head.

Removing the panel gives you access to the bobbin area.


Lifting off the panel reveals a shallow box underneath.  This serves as a drawer.


I took this treadle out to an event with my quilt guild.

Lots of machine and hand quilting going on

Saturday, March 16 was National Quilt-In Day, and the Alamance Piecemakers Quilt Guild sponsored an event at Brookwood Retirement Home in Burlington, NC.  And I can't remember ever typing a sentence with that many capital letters before.  It was co-sponsored by another local guild, a recently created one and I apologize for forgetting their name.


Kathy, cutting fabrics for charity quilts


Guild members came and went throughout the day, doing a variety of quilty tasks.  Lots of plastic sewing machines, two Featherweights, and my treadle.

Residents of the retirement community were invited to stop in and see what we were doing.


look at the flywheel spinning!


Compared to a Singer treadle, the Wheeler and Wilson No. 8 is nice and petite.  I threw a piece of plywood down on a mechanics creeper and made a platform for a traveling treadle.  Borrowed the DH's van with a wheelchair lift.  Took the head out of the machine and laid the treadle down flat in the back of the van, and took it over to Brookwood.

All of that worked well enough, although the creeper/plywood platform thing can be vastly improved, and will be.


The cover plate next to the needle plate is missing.  A piece of the outer wrapper of a bar of Lindt chocolate covers the moving parts beneath.  Until I come up with something better.

The machine called forth lots of memories from the people who stopped by.  A Singer would have been even better for the nostalgia factor, but managing one by myself would not be fun. 


How about your treadles?  Do you ever take them anywhere?  How do you move them around if you do? Where do they go?