Thursday, August 22, 2013

Books! Real books printed on paper. I had forgotten...

I love my Kindle.  I really, really love my Kindle.  And the fact that it syncs with my phone and tablet and I can pick up on my reading on any of them and not lose my place.     love, love, love

In fact, of the thousands (yes, no kidding) of books that used to live with me, most are long gone.  Three categories remain:  classic mysteries (in case civilization fails, I will still have something to read), Arthuriana, and useful-in-the-studio books.  Design and process mostly.

All the following books are in my own library.  All are great in their own various ways.  All the links take you to amazon.com, which does not pay me to do this.  My financial relationship with amazon is that a lot of my money flows through them to various vendors.


Celtic Designs: An Arts And Crafts Source Book.  By David James.


The decal design for the Domestic (see previous posts) will feature Celtic knotwork type designs, and I am ready to begin that part of the process.  So I went down to the studio and rounded up my Celtic design books.  And immediately became very, very happy.


Celtic Stained Glass Coloring Book.  By Courtney Davis.


Initially I thought I would find designs online, but the process was just not fun.  The minute I had an actual book in my hands I was happy and excited.


Celtic Borders & Decoration.  By Courtney Davis.


Nice to remember the thrill of books.  Not giving up the Kindle, though.  For a straight read, it is just the content that matters, not the delivery system.  But for looking at pictures and trying to find one I want, give me a book.  On paper.  That I can put sticky notes on.


Celtic Design. The Dragon And The Griffin:  The Viking Impact.  By Aidan Meehan.

My favorite of all these books, not only because it was a gift from a DD, but because she knew that this would ring SEVERAL of my chimes: art, history, history of art, geography, geography of art.  Not to mention those fabulous Celts and Vikings.  And did I mention dragons?


And now we draw a modest veil over the further proceedings.  Was a scanner implicated?  Were the copyright laws violated?  If you publish a book of designs for artists and crafters, should you not expect that they would blatantly, literally copy them?  Rather than just provide a "source of inspiration" as this book says.

Great Book Of Celtic Patterns:The Ultimate Design Sourcebook for Artists and Crafters.  By Lora S. Irish.


Actually, that last book (terrific book, btw) just did not work for my nefarious plans.  The weight or thickness of the lines in the drawings was too light.  Absolutely great for illustrating the structure of all those tortured Celtic knot animals, but too thin to show up as a nice design element on a sewing machine.  If you're using a scanner.  Which I am not admitting to.


The Ridiculous Economics of Hobbies

or, what I did on my summer stay-cation.

No photos in this post.  Shhh, the whole project is secret.  No one but me will see it until it is finished.

Earlier this summer I bought a very sad and pitiful Domestic High Arm Fiddlebase treadle.  It was $35 on CraigsList and I didn't even try to offer less.  I love to meet sellers who are realistic about the value of old machines.  This lady had several old machines and was quite knowledgeable about them.  She does some kind of re-enactments or ren faires or something (hey, it was more than 2 minutes ago, you don't seriously expect me to remember, do you?).  And she uses antique machines to sew those costumes.

I had been looking for some kind of machine to do experiments on.  Something with relatively no value.  Now, I would not give a hoot if some politically-correct purist called me out for 'tampering' with history.  But I do have my own set of values about this stuff, and usually I do the minimum amount to get a machine clean and running.  But I wanted one I could do ANYTHING to without feeling guilty.  This is that machine.

The big reveal will come later, when I have finished transforming it into a work of wondrous beauty.  But while you are sitting on the edge of your seat waiting, I thought I would share with you the ridiculous economics of this hobby.

Disclaimer:  prices rounded off.  If I didn't remember what I paid, and I usually did not, I looked it up on Amazon.   This economic analysis is for your amusement only, it is not IRS-ready.  My sister in law (bookkeeper and studying to be an accountant) will certainly laugh at my reasoning below.

Here they are, in the order I remembered them. And I almost certainly forgot some things.

$35.00     Machine, cabinet, treadle
$ 4.00      Formula 409, quart bottle. I used it all on the treadle irons.
$ 8.00      0000 steel wool, two packages.  used a lot, probably as much as two packages.
$ 5.00      Denatured alcohol, gallon, cost about $20.  I may have used a quart of it, and will certainly use the rest on other projects, so I am listing this one as $5.00
Free         Old toothbrushes, old rags
$ 3.00      Paper towels, the heavy duty blue shop towels.  Those thing are awesome.  At least one roll.
$ 1.00      Q-tips, the cheap ones from the dollar store.  The cheap ones are actually better because they are less fuzzy.  May have used half the pack.
$15.00     Paint, one quart of Rustoleum hammered black.  This had been sitting in my workshop, unopened, for YEARS.  May have used as much as one cup of the quart.  Not planning to paint treadle irons again, though, so I am listing the full price.
$15.00     Paint, one quart of Rustoleum hammered copper, bought new.  Used a few tablespoons of it.  Have no future plans for it, so this one and the black are listed here at their full price.
$19.00     Xylol, one gallon, to thin or clean up after the hammered Rustoleum.  A gallon was all they had.  Used a few tablespoons.  Yes, this IS the most ridiculous thing on the list---but I absolutely had to have it, and I absolutely had to have it on the day I bought it, so no shopping around.
$ 6.00      Sharpie gold metallic paint marker.  Used the whole thing.
$ 4.00      A set of six detail paint brushes.  Blew through 4 of them BEFORE I got my hands on the xylol, so those turned out to be disposables.
$ 2.00     Two cheap 1" paint brushes.  See above.
$11.00     Wood bleach, 12 oz.  Only used a bit and will probably never use it again.  More on this later when I describe the project.
$ 1.00       Latex disposable gloves.  Price based on a portion of a box.  I like the ones with powder inside.
$10.00      Clear coat spray paint.
$ 6.00       Decal setting solution.
$17.00      DIY decal sheets, ten.  I haven't done the decals yet, so I don't know how much of this or the clear coat I will use.  Probably at least two of the decal sheets, though.  Whether I ever use the rest of them depends on how well this project turns out.
$10.00     Wood stain, 2 cans, dark and medium.  Did not work out well, but I might use them for other projects in the future.
$ 2.00     Tung oil, quart, $17.00 but enough for several projects.  So I just guessed at the $2 number.  I liked it a lot when I used it on my Davis NVF, not so much on this project.  So the future of the rest of this quart is uncertain.
$ 5.00      Sandpaper
$ 6.00      Knobs, metal, three.  Actually I have no memory of what I paid for them.
$11.00     Sewing machine needles, three.  Yes, it takes obscure and obsolete needles.  Of course.


$196 total.  mwahahahaha.   Is this now what the machine is "worth"?   MWAHAHAHAHA.

How about adding in the labor?  I have a general idea of the time I spent (and will spend to finish), and it is somewhere between 100 and 150 hours.  No kidding.

Let's be conservative and say 100 hours.  My time (and yours, and everyone else's) is worth $25/hour at a minimum.  The guy who mows my yard charges more than this.  Are you worth less?  No.

$196 + (100 hours x $25) = $2696.  Yeah.  Right.

So what is the REAL economic story here?  For less than $200 I amused myself no end for over 100 hours.  I have lots of chemicals and supplies left over for future projects.  I will have an amazing sewing machine like no other at the end of the project.  It will be worth $35.  It might even sew.  I don't know, I haven't tried yet.

Yes, you heard that right. I have not tested it yet. I started dis-assembling it for cleaning and painting before those precious antique needles arrived.  The point of this project was the experimentation, not the end product.

Are you anxious to see that final product now?  So am I.  One more coat of paint and then the decal creation and application to go.

I don't usually spend 100+ hours on a machine, but this summer has been a b.  You can spell the rest of it for yourself.  And I am not talking about the weather.

There are many of us who use craft and hobbies to distract ourselves from the unpleasant realities of life.  If you are also one of those people, please know that you are not alone.  If you are feeling alone, start a blog.  You might be amazed at where it will lead you.

Sunday, August 11, 2013

Domestic High Arm: Handwheel Conundrum

Back again with more questions for the cognoscenti about my Domestic High Arm Fiddlebase.

This time, I am stumped by the handwheel.  I am trying to remove it for a thorough cleaning.  On this
Domestic the treadle belt track is on a separate wheel behind the outer handwheel.  Neither one is coming off at the moment.

The normal thing to do would be to remove the clutch knob, right?  Well, this clutch knob is not budging.

the green one SHOULD say "pin on the clutch knob" rather than "clutch know"

Problem is, there are two pins, one on the handwheel and one on the clutch knob.  When you turn the clutch knob to the left, as you would normally do to remove it, the handwheel pin is in the way of the clutch knob pin and will not let you unscrew the clutch knob.


When you rotate the clutch knob to the right, they move apart from one another and this is also the motion to lock the handwheel to the treadle belt wheel so that they move in unison. 


I thought maybe I had it figured out when I found a screw in the handwheel and removed it.  But that changed nothing.  Both wheel spin fairly freely, but they are not coming off of the shaft.  I have looked for additional screws but found none.

Help!  Anyone?  I've done the usual with Liquid Wrench, heat from a blow dryer, etc.  Nothing changes.  Do I need the brute force method?  Whack it with a large hammer?  It is not budging in the slightest way at the moment--no wiggle to it at all.

Unrelated to the problem, but interesting:  there is a date visible on the inner (or machine-facing) edge of the treadle belt wheel.  Frustratingly, the year is not visible.

Does anyone have something similar?  Does yours also say Oct. 15th?  Does it have a year?


Any information gratefully received.  thanks in advance!

Friday, July 26, 2013

Domestic High Arm Fiddlebase: What are the extra holes for?

I'm having tons of fun with a Domestic high arm fiddlebase treadle that I picked up for $35.  I had been wanting something like this to play with, where I could do whatever the heck I pleased without guilt.  You will see what I am talking about later.  Perhaps much later---I never know how long these things will take.


So here's the quick question:  What are the extra holes in the wooden top for?
There are holes for the treadle belt.
There is a hole corresponding to a hole in the front center of the machine that I think is for a bolt to secure the machine down. It is drilled all the way through
There are holes for the bonnet top (sometimes called "coffin top", ewww).  Projections on the bonnet top slide into the holes to keep it in place.  These holes are in metal.
There are holes for the pins or projections on the bottom of the machine to rest in.  This keeps the machine firmly in place.

However there are a set of extra holes.  These are drilled about halfway through the top, and were filled with what looked like bathtub caulk.  On top of each one was a felt pad, each one secured to the wooden top by the tiniest pins I have ever seen.

The holes for the machine pins (small bumps on the bottom of the machine) are identical to the mystery holes.  They are the same size and also drilled about halfway down into the wood.  Because I stupidly did not take "before" pictures, I can't swear as to whether they also had the caulk and the felt.  

I "get" the felt pads, which would cushion the machine, protect the wooden top, and probably cut down on noise and vibration.  What I don't "get" are the caulk-filled holes.

Any ideas, o brilliant ones among you?

Saturday, July 6, 2013

Mysteries of Antique Quilts


Are you intrigued by the mysteries presented by antique quilts?  It is so much fun trying to discover as much as we can about each quilt that comes our way.


Heidi brought over a quilt from her husband's family and we studied it together.   It has a tag on it showing that it had been documented in the North Carolina Quilt Project in 1985.  It is in remarkably good shape for a quilt of its vintage, which Heidi estimates is around or shortly after the turn of the 20th century. 

It appears to have been hand pieced and partially hand appliqued in a Hawaiian pattern, with the usual echo quilting around the motifs very nicely done.  In fact, almost everything about this quilt has been very nicely done.  And herein lies the mystery.


There is no quilting at all in the interior of the motifs, which of course is a reasonable design decision.  But as I studied the quilt I noticed that the edges of the motifs were sewn by machine, and to a much lower standard of quality than the rest of the quilt.  I've seen this kind of thing before, and I leaped to the conclusion that this quilt had been repaired.  Perhaps the fabric of the motifs had frayed and someone later sewed new cloth down over them.


But no, I was wrong.  Flipped the quilt to the back side and saw that there was no evidence of machine stitching.  Those motif edges were sewn down by machine BEFORE the quilt was quilted.


Back to the front side for a closer look, and I noticed that the innermost portions of the motifs had all been appliqued by hand.  And the pattern was the same for each of the large blocks:  innermost edges all hand appliqued (and very nicely, like the rest of the quilt), outer edges all sewn by machine (and with much less skill).  By innermost edges I mean the central star and the linear features radiating outward from it.


So what happened?  Did the quilter get sick of all that hand applique and give up? 

This would mean that she was working on all of the blocks at the same time and had all of the innermost edges of ALL of the blocks done before giving up.  Does this make sense?  Not to me, but then I don't applique.  What do you think?

Did she suddenly receive a nice new sewing machine?   Same objection as above, with an additional objection:  if she got a sewing machine and decided to use it to finish up that applique work, then why would she piece the blocks together by hand? 

I'm sure some quilters continued to piece by hand even after they got that nifty new treadle, but most were quite willing to jump on the sewing machine bandwagon and piece the blocks on the machine.  Perhaps they might continue to piece small blocks by hand for the fun and portability of it, but these are giant blocks.

Ah, mysteries, mysteries.  Heidi and I had fun studying her antique family quilt and I hope you have enjoyed it too.  If you see any clues we missed or have any deductions or guesses of your own, I hope you will leave a comment below.

Saturday, June 29, 2013

Lust and Regret: The Belvedere Adler


Object of Desire:  Belvedere Adler.  Spoiler alert:  The story has a sad ending.


WW8:  Fascinating to be able to watch everything working


I buy machines all the time and for lots of reasons. Sometimes I just feel sorry for them. There they sit, all sad and pathetic, and I know that if I don't take them home they will end up in the scrap yard. Sometimes these turn out to be wonderful machines. The Wheeler & Wilson's No. 8 was one of my all time best-buys.


Sometimes I want to save other people from them. That's how I ended up with three Singer 285s. The first one was a gift, and I was thrilled to play with it and examine its funky drive train. 

There was NO EXCUSE for buying the next two. None. But I was afraid some nice young person would come along and think "wow, what a cute vintage Singer" and ruin her life. 


Singer 316G, an enduring love affair


Sometimes I just fall madly in love. Madly, passionately in love. And usually this works out.


But not always.


In a two week period I acquired not one but two Adler Belvederes (or maybe it is Belvedere Adler). 

I would not even call this love---it was lust. Primal lust. This machine is the epitome of postwar coolness. Look at the space age silhouette. 


Look at the gleaming chrome. Look at the awesomeness of the dials. It should be in a movie set.

In a movie set, but NOT in a sewing room. 

Yes, it looks all postwar strong, and it is the usual horrendous weight of cast iron machines. I've been trusting unknown machines based just on the weight. This time that did not pay off. 

This gorgeous machine has a serious, life threatening defect: a geared plastic component just waiting to break. 


Of my two Belvederes, one of them is fine—so far. The other one is now a straight-stitch only machine because a gear deep inside has a big section of missing teeth.

I will be listing the working one for sale later, and the ad will link back to this posting. I'm a full disclaimer seller. The price will be low. We've got a nice movie industry here in North Carolina. Maybe someone will buy it for a movie set.


Saturday, June 1, 2013

Frankencranky and the Spring TOBE

Sounds like the title of a children's story, doesn't it?

Frankencranky's story is below

One of my friends from the quilting guild has expressed interest in getting a 3/4 size hand crank for her granddaughter.  So I've been digging out all the possibilities and fitting them up with hand cranks.  Sometimes I like to have a theme for my sewing machine tinkering and this fit my mood nicely.
Singer 185.  Handcrank and spoked wheel painted with Krylon Celery.  A good match for the nose plate, not really visible here.


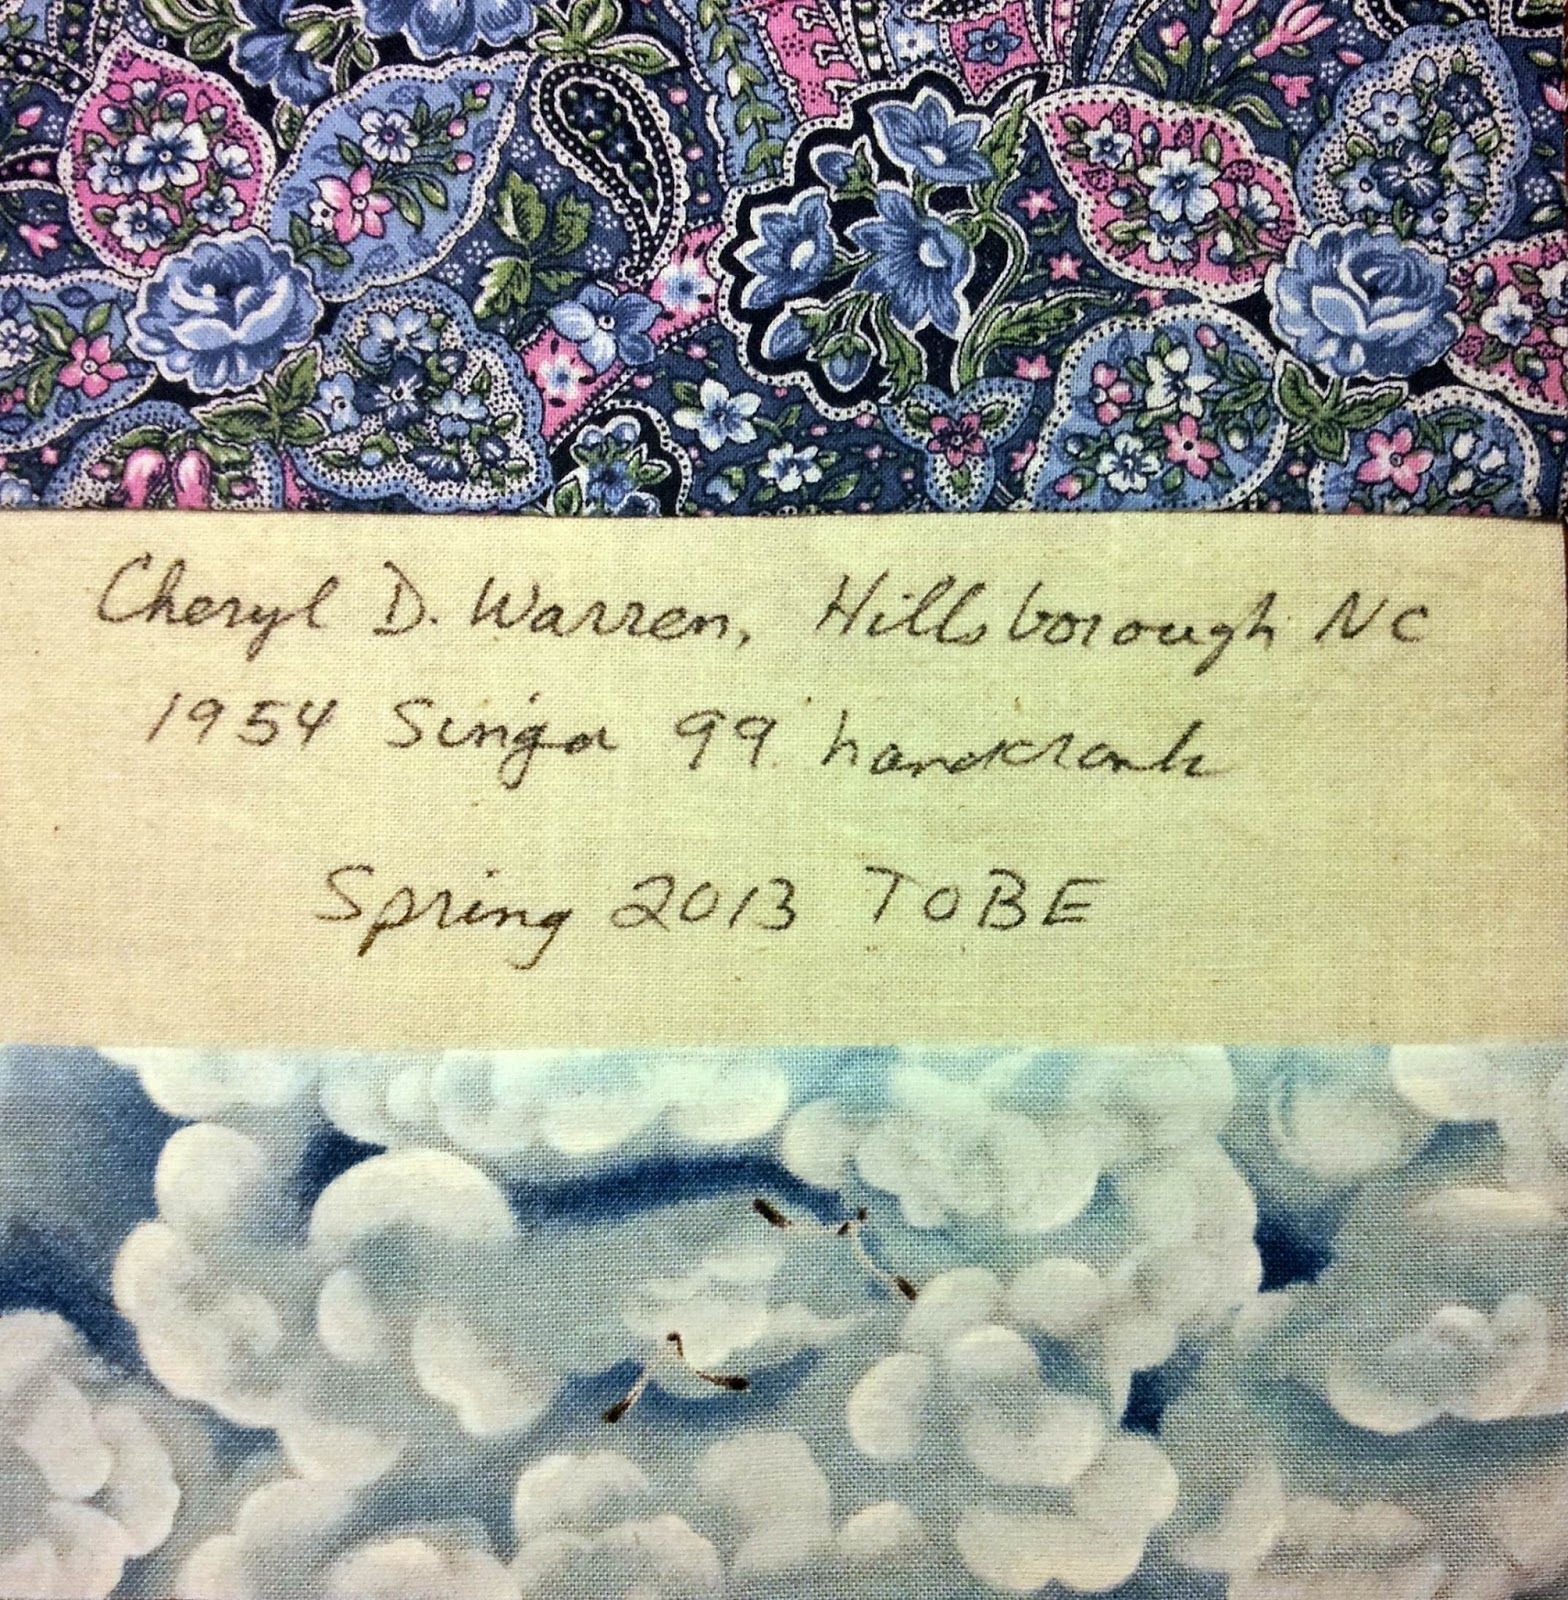
Simultaneously, it was time for the Spring TOBE:  Treadle On Block Exchange, in which we exchange quilt blocks signed with our names and towns and machines.  Very cool.  So the test run for each machine was a set of TOBE blocks (6 blocks in a set, which is what you get from the WOF, width of fabric).  Of course I have to make life more difficult by making one extra block to keep for myself.  Since I buy and sell machines the blocks make nice mementos of my machines that have moved on.

1954 Singer 99


The usual suspects for hand-cranks-for-children are Singers:  the models 99, 192, and 185.  The sewing machine gurus tell us that these are all pretty much the same mechanically.  The 192, labelled "Spartan" was a budget version.  The 185 was the latest one, a two-tone green.  They are all very simple and easy to operated straight-stitch-only machines.  They use the simpler class 66 drop-in bobbin.


Next up on the workbench was one of the luscious jewels of my collection:  a 3/4 size pearlescent aqua 15-clone.  OK, OK, technically it can't be a clone if it is different, in this case smaller.  But in every detail it looks exactly like a Singer 15.  Word on the boards is that these are very rare.

in real life the paint job on the hand crank is an almost perfect match


The handcrank conversion was a piece of cake.  The spoked wheel fit and the bobbin winder still worked with no need for adjustment.  It turns smoothly and easily. 

I lightly sanded and used an auto primer on the black parts of the spoked wheel and the hand crank.  I have an awesome collection of Kia auto touch up paints in little bottles, complements of my local Goodwill store.  I mixed an aqua with some white, and it looks much closer in color to the paint job on the machine than it does in the photo. 


Long time blog readers have seen this National before.  No way to attach a reproduction hand crank, hence the little knob on the handwheel.   That means that you get one revolution per turn, rather than the 3 you get with a geared hand crank.  Tedious does not begin to describe the sewing experience at this pace.  And if that is bad, winding the bobbin is excruciatingly boring.


But the exciting news is that I did get it to sew!  With a little help from the online community, who post photos of threading paths, and send emails with technical details about those obsolete needles.  In this case scooting a regular needle down 3/16" worked a treat.

First time I ever used a leaf tensioner.  Super easy.  The screw regulates the tension.  It works well, too.  Much better than the tensioner on my $800 plastic embroidery machine.


Getting this fully rehabilitated from its original rusted and frozen state was deeply satisfying.  The last piece of the puzzle was figuring out how to wind the bobbins.  I believe that originally the winder would have ridden on the treadle belt.

One of those stretchy rubber motor belts was the perfect solution.  And the gurus tell us not to use them on motors, so I have some that had been removed from their machines.  Never throwing things away often comes in handy.


Pull forward on the winder with your left hand while turning the hand wheel with that knob with your right hand.  Several hours later your bobbin will be wound.  (no, really it wasn't that bad.)


Who might enjoy using this sewing machine?  A small girl who is making doll clothes.  With very tiny seams.  And whose grannie loves antiques and is not intimidated by a vibrating shuttle machine.  Probably nobody else, though.


Once upon a time back in the late 1960's (according to bulletin-board-lore),
Sears advertised a sewing machine for $99 (which was inexpensive for the time).  All metal construction.  The ads were in newspapers, printed in black and white.

Then when the customers got into the store, this is what they saw.

Kenmore 159.11


Garish pink.  Vibrating shuttle (those bullet shuttles that hold the spindle bobbins).  A bobbin technology that had been obsolete for decades (and just like the system on the antique National above).  Sears distributed them to their stores in small quantities.  The point was NOT to sell these machines--the point was to sell the customer something much more expensive. The $99 ad just got the customers into the stores.


I cleaned, oiled and tested this one a couple of years ago.  Except for the Pepto-Bismol pink color (which I actually like) there is nothing wonderful about it.  Fairly crappy machine.  Rattly and noisy.  Mediocre stitch quality.


these appear to be the same size as Singer bobbins, but the hole in the top of the bobbin fits over a post on the bobbin winder
Flashing forward to 2013:  because not many of them were made, they are now rare.  One of these sold on eBay for $211 (plus shipping of course).  Mine is missing a decorative button, which probably cuts the value in half.

Krylon Watermelon on the wheel and crank


The hand crank conversion on this one was a delightful surprise.  I didn't want to notch out the handwheel.  Because it is "collectible", I don't want to do anything that can't be reversed.  I have a stack of handwheels that Augustin notched out for me a while ago, and one of the small non-Singer wheels fit perfectly with the bobbin winder.  The reproduction handcrank fit nicely and it all turns smoothly and freely.  The conversion took less than five minutes.  It is as easy to use as the 185 or the Spartan.

There is still the vibrating shuttle problem though.  It's not really difficult, it is just different.  Most people want a system that they already understand.   And who can blame them? 


Singer 285. 

And I saved the worst for last:  the notorious Singer 285.  Known as the worst all-metal vintage Singer model.

Hammered aqua blue paint finish and cute as a button but with a completely whacky drive train.  Jerky as a result.  With a motor you get all-or-nothing as your speed options (at least on mine).

I wondered if removing the motor and operating it at hand crank speed would result in a good sewing experience.


In a word:  No.  And the six people who receive a Singer 285 TOBE block from me this year should treasure them as rare and wonderful objects because there will NEVER EVER be any more of them.    And nobody other than me would be stupid enough to convert a 285 to a hand crank. 


The problem is that drive train.


It gets to one end and it requires extra force to get it to change direction and get it going back in the other direction.  That's my hypothesis anyhow.


It makes for a bumpy hand cranking experience.  It was hand to hand combat all the way.


The hand crank conversion did not go well.  First, the spoked wheel would not fit, and neither would any of the other notched wheels I had on hand.  Using my rudimentary Dremel skills I managed to cut a notch in the handwheel, only to discover that the finger of the hand crank would not reach it.

I got a big kick out of figuring out how to make it all work.  And hopefully by telling you all about it here, I will save you from wasting your time.  


How to convert a Singer 285 to hand crank

So here's what you do:  First, reconsider the whole project.  Go sit down and think it over.  Have a stiff drink, or a hot bath, or both. Still committed to this path of folly?  OK

Cut a notch in the hand wheel (notch the size of the hand crank finger, natch!).

I used a Dremel tool to cut the notch, and lots of trial and error.  I'm not planning to reveal what attachment(s) I actually used because it was undoubtedly all wrong.

If I ever master the esoteric mysteries of Dremeling, I WILL reveal them here.


Put the hand wheel and clutch knob back on the machine.


Remove the silver colored piece from the back of the finger of the hand crank. It unscrews.  This will allow it to fold down far enough to meet the hand wheel.

 Don't lose that little screw because when this sorry mess is over and you are regretting ever doing this you will want to take the whole thing back apart and reuse the hand crank on a more deserving machine.


Slide a 4-inch hose clamp over the hand wheel and tighten it most of the way down.


Attach the hand crank and slide the finger into the notch on the hand wheel.
Tighten the hose clamp until all is secure.


Sew away!  Feel that thunk at one point in each cycle?  That's the end of the line, literally.


I call him Frankencranky. 

FRANKENCRANKY!


Here are the blocks I made for the TreadleOnBlockExchange.  The photos of them are not really that interesting, but it helps me remember which fabrics I used, so that I don't use them again.

I received lovely blocks in return, from all over the US, and it was fun to get blocks from people I know from the board.  But since each block has personal information on it, I don't think I should show them here.  Thanks to all who participated, and especially the hardworking hostess of the exchange, Marie.


Wednesday, May 8, 2013

How To Get Rid Of A Treadle

I get questions like the ones below from Daphne and thought it might be useful to put my ideas online.  Readers are invited to chime in with their own ideas in the comments section below.

Daphne wrote:
Good Morning!


I stumbled across your blog while trying to find information on a Run Easy treadle sewing machine that I have. Long story short(ish), I came into possession of this machine about 10 years ago when a friend got divorced and moved across country. She couldn't take the machine with her, but really didn't want her ex-mother-in-law to get her hands on it, so it ended up in my care. Fast forward 7.5 years, I'd lost track of that friend, gotten engaged, and ended up moving the sewing machine from GA to NH into my husband's small log cabin. Fast forward another 3.5 years to today where my husband and I are expecting our first child in a couple of weeks and find ourselves crunched for space.


The sewing machine is in pretty good shape from what I can tell. The wood cabinet has gotten a little dried out in our wood stove heated cabin, but I think a very little TLC with a light sanding and oiling is all it really needs. The sewing machine itself looks to be in good working order. The bobbin is still in place (one of the oblong type) and is even still threaded. The belts are still in one of the drawers of the cabinet.


Ideally, I'd love to see this sewing machine go to someone who will love it, take care of it and use it. If you have any suggestions on how to go about doing that, I'm all ears. If not, our town's yard sale day is coming up in two weeks and I will have to put this lovely machine out for sale, so my other question would be - what is a reasonable price for a sewing machine of this age in pretty darn decent condition? I have heard that many people today think that it's great fun to take an old sewing machine like this and gut it for other decorative purposes. I REALLY don't want to see that happen to this beauty. If I can find someone who will take her and love her and treat her right, I'll pert near give her away. Otherwise, at this point I'm planning on pricing her for a pretty penny just to discourage the idiots.


Thank you for any advice you may have!

Well, Daphne, first of all we all appreciate your desire to preserve a possibly working machine and save it from the dreaded fate of being converted into something else.

The economic realities of the law of supply and demand are going to bite you, however.  Supply:  there are literally millions of treadles lingering in parlors, basements, garages, and barns.  People have a sentimental attachment to them and keep them.  People are under the mistaken impression that they are worth something, and they keep them.  People don't know how to get rid of them, so they keep them.  Anyway, they keep them.  And eventually they try to get rid of them.  The supply of these things is ENORMOUS.  Check CraigsList for any major or minor city at any time and you will see them.

Demand is a different story.  A very, very small number of people want to sew with them.  

So:  Huge supply, almost no demand = very low cost.  This surprises all of those folks who spent $300 to $500 on one back during the brief period in the late 70's to early 80's when country decorating was all the vogue.  They absolutely do not want to hear that $30 to $50 is a reasonable price today.

Yes, you heard me right.  For a treadle such as you describe (unknown working condition, brand name nobody has heard of, wood not in perfect condition), you will be lucky to sell it at all.

There are exceptions of course.  If you have a treadle in perfect working condition, with immaculate woodwork, and with a gleaming and glossy sewing machine in it with absolutely gorgeous and intact decals, then $100 is a reasonable price to ask. You might even get it.

There are even some exceptions to this, for very rare and unusual early machines.  I'm not buying in the "collector's" market however, so I can't give you good advice about this.   The fact that I have never heard of your brand name does not mean that it is one of these rare and valuable ones, btw.  It was almost certainly made by somebody else and just badged or labeled with this name.


Oh, and by the way, the prices that people ASK on CraigsList are no guide to what they sell for.  There is no way to track what they actually sell for.  I look at CraigsList every morning, and I know that treadles often sit on CraigsList for months and months.


How about giving it to charity?  Any charity that USES sewing machines needs ones in good working order.  Any charity that SELLS sewing machines will have the same problems getting rid of it.  I regularly make the rounds of my local charity shops, and most treadles in the condition you have described sit for months or even years.  Yes, years.

So, what should you do?  My first advice would be to post a notice on the "treadleon" bulletin board.  This is where that tiny group of dedicated treadlers hang out online.  Mention your specific location.  If you really, really want it to go to a treadler, I would even offer it for free.

If you want to dispose of it at your town's annual yard sale, this is the marketing approach I would take.  Make a big sign saying something like "FREE TREADLE SEWING MACHINE:  APPLY HERE".   Then I would take applications.  Have them write a paragraph describing what they would do with the machine and why they want it.  Then give it to the most deserving person who might actually appreciate it and preserve it for the next generation.

Before you take it to the yard sale, I would also advise that you pick up some sewing machine oil and a treadle belt (I think you can still get them at Joann's) and see if you can figure out how to install it (very simple, and YouTube should help).  Give the machine a drop of oil at every point where metal moves against metal and see if you can get it turning freely.  Oil the treadle irons too.  If people can see it actually moving, you have a better chance of somebody taking it off your hands.

And that is the real point of my advice:  instead of thinking about selling it, think about how to find the right person to take if off your hands.

On the other hand....baby on the way?  any chance you will want to do some sewing in the future?  A nice treadle is a wonderful thing to have in the house.  Nice and quiet, too---won't wake the baby!  And the same group at treadleon will fall all over themselves helping you online.  Think about it!

.........

OK, all of my imaginary friends blog buddies:  please add comments, suggestions, or complete refutations of the advice I have given to Daphne!  And if you know who manufactured the "Run Easy", please let us know.

.........

Daphne wrote back to thank me for the suggestions and to tell me her plans
  • first, try to track down the original owner to see if she wants it back
  • next, to contact a local quilt shop to see if the owners know of anyone who would want it
    • good suggestion---I should have thought of that!
  • finally, contact treadleon
Good luck to Daphne in finding her machine a good home.  Kittens are easier than this!