Friday, August 1, 2014

Introducing: RIVER SONG!!!


After a long time and much indecision and waffling, I have finally finished the sparkly blue repaint and decal job on the Singer 27.  Her name is River Song.  Dr. Who fans will get it.

Singer Model 27, circa 1900
You have seen it here before:  getting the paint stripped off of it, and getting the sparkly blue paint job

A shout out to Christy H for suggesting the name "River Song" for this machine.  I met Christy on a private Facebook group.   I had been racking my brain for a blue-related name.    Thanks, Christy, "River Song" is the perfect name!

Now I am here to tell you what I did with the decals and why, what worked and what didn't and why, what I would do again, and what I would do differently the next time.

My first painting and decalling project was Shield Maiden, and I deliberately created black decals because I knew that adding color would complicate the process.  This time I planned to make my own color decals.

Folks, it just did not work out.  I spent an estimated 50 hours (I'm not kidding) searching for and messing with possible images for decals.  In the end, I just could not get images that would look good against the sparkly BRIGHT blue.  At the 50 hour mark it stopped being fun and became agonizing drudgery and I quit.  After all, this is a hobby and it is supposed to be fun.

This doesn't mean that I have given up on the color decals.  I do have a plan, involving silver hammered Rustoleum and another Domestic high arm fiddlebase and I will tell you all about it later.  Probably much later.

So there we were, the sparkly blue 27 and me, thinking about our future.  It was too pretty just to abandon.  It needed decals, just not color decals.  I could have done black again, and that would have worked, but I had already done that and I wanted to explore something else.

So I bought a set of decals from Keeler Sales on eBay.  They have a variety of decals for a variety of sewing machines, many Singer models and some other manufacturers' models also.  I bought the flat gold gingerbread style for the Singer 27 and 127.  $55 with shipping.  They do decals in color also, but they don't look like convincing duplicates of the original decals to me.  But I have not seen them in person so I don't really know.  The gingerbread or Tiffany style decals are very ornate and I thought the flat gold would look good against the bright blue.  And it does!


I used Keeler decals once before, to replace flat gold decals on the bed of a Singer 301, and I liked them.

Myra (another treadle fanatic frequently mentioned here) and my friend Becky (crafting person but not yet sewing person) came over to watch the decal application.  I discussed the process of applying waterslide decals in some detail here when I decalled Shield Maiden, so take a look if you want the DIY details.


I have a Singer 115 with Tiffany/gingerbread decals and we got that out for a side-by-side comparison to see where the decals go.  FIRST MISTAKE.  The 115 is fatter and has a shorter harp width than the 27.  Not the same shape.  And Keeler has a nice photo of the 27 with Tiffany decals.  I should have used their photo as a guide.

Decal #1:  Back of the arm
We began in the back of the machine on the theory that my technique would improve as I went along and any mistakes were more likely to happen first.  We looked at the 115, found the same decal on one of the two Keeler sheets, and cut and applied one decal at a time.  SECOND MISTAKE.  What I should have done, and I actually thought about this ahead of time and decided not to be so obsessive, was scan and print the Keeler decals, cut them all out, and figure out where each one would go on the machine before even beginning.  Although looking at the Keeler photo would probably have been enough to prevent the problems:

On the 115, the decal wraps around the spool pin


Placement Mistake #1:  Spool pin and oil holes


The oil hole placement is a bit different on the 115.  In retrospect it is glaringly obvious that these two decals should have straddled the spool pin and oil hole on the longer 27.  But on the 115 one of the decals sits right over the spool pin, so that's where I put it.


Looks stupid, does it not?

Placement Mistake #2:  Front and back of the nose.


I did the back first and just chose the wrong decal.  When I got around to the front, the other nose decal did not fit.  I trimmed off some of the outer detail and made it fit.


Placement Mistake #3:  Pillar decals


The pillar decals on the 115 sat all the way at the bottom of the pillar.  I thought they would look better if I moved them up 1/4".  Myra was skeptical.


I should have listened to her, because by the time I got around to the front of the pillar I found that this resulted in a small part of the decal being underneath the bobbin winder attachment point.


None of the placement problems bother me, btw.  The spool pin will be covered by a felt or a spool pin doily.  The other mistakes just don't look that bad.  And Myra, who has a trashed out 27 of her own and plans to paint it fire engine red, says that this was just a trial run for HER machine!


the length of the bed edge decals made them quite tricky


Up to this point all went fairly easily.  The arm and bed decals were MUCH more challenging because they are so much larger.  It is more difficult to get them into the correct position, and more difficult to slide them into a slightly new position once they are on.  There are many more wrinkles and bubbles that have to be finessed out.  It all did work out, just with more time and trouble.  When I do my own decals on the next machine I will remember this, and do smaller decals, or decals that will go together in pieces with each unit smaller.

see the wrinkles?


There was one problem with the front arm decal that I anticipated, because I had the same problem on Shield Maiden.  You cannot expect a flat decal to go smoothly over a convex surface.  I attempted to solve the problem in advance by cutting tiny snips into the outer edges of the circular design on the pillar end of the arm. (Just like clipping the edge on a curved seam in sewing.)  It worked, but only partially.  If I had cut further down into the decal it would have worked better.  I chose areas where breaks in the design would not be too obvious.  But because I did not cut far enough in, I still got a couple of wrinkles that just could not be smoothed out.

Placement Problem (not a mistake of mine):  Bed decals


The bed decals are in four parts:  the left end past the slide plates, the front, the back, and the center of the bed.  I put the left end on first, and I am glad I did.  I really think that the decal itself is just a trifle too long for the machine.  The only possible placement was to begin exactly at the front edge of the bed and run to the back edge.  This looks OK.  But when I tried to line the front and back decals up with the left edge decals, I ended up with a portion of the design dripping over the edge of the bed.  Moving them back would have removed the drip,  but then the design elements would have been mis-aligned.  I went with the drip.


The biggest problem with the decals, and this DOES bother me, is the fact that the decals themselves are apparent against the sparkly blue paint.  You can see the edges of the decals.  They look like they have very tiny air bubbles underneath them--because they do.  This was obvious while I was applying them, and no matter how much pressure I put against the edges of them, the problem persisted.  They also appear to be raised above the paint finish--because they are.

OK, so it's not THAT obvious.  But it bothers me.


I know that this is NOT a problem with the decals themselves.  This did not happen on Shield Maiden, where they just melted into the paint job and are invisible, except for one spot where there is a tiny air bubble that I missed.  It is not apparent on the black Singer 301 either.  Both the Keeler decals and my DIY decals worked just fine on other machines.  So what happened here?

It's the finely grained texture of the sparkliness of the paint.  To go to an extreme, imagine applying decals over coarse sandpaper.  No matter how hard you worked, the decals would still be sitting above the surface of the paper itself, and there would always be some tiny pockets of air around the grains of sand.  The grains of sparkliness are much tinier than sandpaper, but the effect is the same.

Sigh.  I do love this paint, but I will never use it again on any machine with decals.  I might use it on a vintage (as opposed to antique) machine with badges and dials and no decals, but I haven't been planning to paint any machines of that type.  It really is pretty, but the extreme sparkliness really only shows up in direct sunlight.  It is still pretty indoors, but loses much of its drama.

Update:  In the comments section below "Dre in PA" asks about the clear coat process which I discussed in an earlier DIY decal post.  On thinking over her comment it does (NOW) seem pretty obvious to me that clear coating BEFORE applying the decals over the sparkly textured paint probably would have solved this problem.

The bobbin winder is a tricky son of a gun to paint, so I decided not to.  I stripped off the black paint and then wire brushed the cast iron portions to a gleam.  Then I used clear nail polish to seal and protect those parts only (not the chrome plated parts).  Seemed like a good idea, and easy to apply with the little brush.  Because the chrome is completely gone from the nearby handwheel, the silver-ish steel and iron colors match.


Notice that the badge is being held on by only one little pin.  One of them fit into its hole and I tapped it back in with a small hammer.  That worked.  On the other side, the hole is not as deep and the pin would not go in.  I'm still thinking about what to do about this.  Probably just cut that pin shorter and then whack it in.

Access cover before any restoration


This machine came to me in pretty bad shape.  The decals were mostly gone.  The paint was worn and chipped.  The metal parts were missing chrome, some were slightly rusty, and some were slightly corroded.  400 grit sandpaper took off the light rust.  The dremel rotary tool and some wire brushes helped a lot.

However, the round access port cover on the back still looked pretty bad.  Black showed inside the corrosion and no amount of polishing or wire brushing removed it.  Time for more experiments.


Although I have never liked the look of painted metal parts, this needed serious help.  I used a fine tip silver Sharpie PAINT pen (not a marker) to cover the inside or lower level of the design.  It took a couple of coats.  The fine tip allowed me to keep the paint on the lower level.  Then I used a silver Sharpie MARKER to go over the corroded areas of the raised portions of the design, and wiped this off with a paper towel immediately.  The point of this was to get silver down into the black corrosion pits but leave the raised design with whatever was left of the original chrome plating.  The silver paint and the silver marker were slightly different colors of silver and this worked well.  I'm really happy with the results.

I have discussed in detail every problem that arose, every flaw that I can see.  This is so that when YOU paint a machine you will know some of the pitfalls, have realistic expectations, and get your best possible results.  Don't think for a moment that these problems mean that I'm unhappy with the machine.  I think it is gorgeous.

Everyone keeps asking me what I am going to do with it.  How the heck should I know?  The whole point was to experiment and play, and I chose my most cosmetically horrible machine to do it on.  This particular machine has no motor boss, so I can't put a hand crank or a motor on it.  It can only be treadled.  I have a surplus of treadles.  Would I sell it?  Maybe in a year or so.  Maybe sooner.  Best offer over $500 takes it, and I will throw in a Singer parlor cabinet.  Mwahahahaha.


Wednesday, June 18, 2014

NC TOGA 2014


I'm still dithering about the decals on the painted Singer 27, so while you are waiting for that let me tell you about the great time we had at the recent NC TOGA (Treadle On Gathering and Academy).  Here's what this TOGA is all about.

First, no one wears togas.  Too bad really, that would add to the fun.

It is a geekfest for those of us who love people-powered sewing machines:  treadles and hand cranks.

photo from Facebook
We meet once a year at Smyrna United Methodist Church, which is nominally in Monroe NC, but really is out in the country.  Lovely country.  We stay at the Best Western Motel or nearby Quality Inn in Monroe.

It's a swap meet.  I sold six sewing machines and didn't buy any.  For me this is a huge win, because I really need to thin the herd.  I did bring one home, but more about that later.


It's a chance to admire other people's sewing machines.  One large room is devoted to sewing, and a few people volunteer to teach a simple technique or project.  I now badly crave a mocha and dark beige Singer 201 natural born hand crank.    You can see the object of my desire to the extreme left front of the photo, which does not do it justice.


The sanctuary is draped in quilts, all made (at least partially) on people powered machines.


We swap quilt blocks, also made on people powered machines.  Here you see my friend Linda and her adorable daughter Naomi working on Naomi's blocks.  I have Linda's permission to show photos of Naomi.

There are optional side trips.  I skipped the trip to Mary Jo's fabric store this year because I went there with my guild in March and my wallet has not recovered yet!


But I did go to Harry Berzak's private museum of antique sewing machines.  Hundreds and hundreds of sewing machines.  This is just one row of them in one room.  There were three or four rooms.  I was drunk with sewing machine lust after a while which is why I don't know if it was three or four rooms,  or maybe even more.


The lion is a sewing machine.  Yes, it really is.  Naomi and I both liked this one a lot.


Lots of toy sewing machines also.  Lots. And lots.  This is just a sample.


Mr. Berzak was a charming host.


This machine is one of his recent acquisitions, and it was originally covered in grime with no hint of the mosaic of mother of pearl beneath.


I could go on and on and on.  But time to get back to the TOGA.

We finish up with a raffle of sewing related stuff donated by the attendees.

Raffle table
Naomi helped Susan Mullis, hostess for this annual event, draw the raffle tickets.  Thanks, Susan, for all of your efforts.  


I took a child sized ironing board and spent a couple of days trying to give it to Linda for her little girls.  She claimed that she had no room for it so I donated it to the raffle.  Then Linda gave Naomi some raffle tickets.  Guess who won the ironing board?  Mwahahaha.

I put a $1 ticket in the bag for a sewing machine and won it.  It's a beige 15 clone with a dis-assembled tensioner.  I don't think many people wanted it.  I'm not really sure why I did, but if I can't get the tensioner back together I'm sure it has more than $1 worth of parts on it.


The best parts of the TOGA: the people of course.  I had a lovely time earlier in the week with another formerly imaginary friend (but forgot to ask permission to mention her name).  Then Linda arrived and I also got to hang out with her and her friends.

And Naomi.  The best part of all was hanging out with Naomi.


Friday, June 6, 2014

Painting the Naked Singer 27


Updated on July 30, 2014 to include the prices of the products used
The last post covered the process of stripping all of the old paint off of a Singer 27.  Here it is naked and prepped for painting.


Just like any other painting job, most of the time is spent in preparation.  Many hours of prep but the actual painting only takes a few minutes.

Citra Strip to remove the paint, one quart is $12 and will do 2 or 3 machines.

Blue painters tape, $5, and you will have most of the roll left over

I did some looking online to see what the products and options were, then headed to my local Auto Zone store to talk to an actual human being.  And wow, did I luck out.  The manager restores vintage motorcycles, and also used to work for NASCAR.  He spent half an hour with me answering all of my questions and giving me detailed advice.

I told him that I had stripped a sewing machine down to bare cast iron and I wanted to paint it with something wild and super sparkly, from a spray can.  Real auto painters have spray guns, of course.

I'm going to share his advice with you and give you links to the products.  As always, and sadly, no one pays me to do this.  All of these links take you to Auto Zone because I am grateful for the manager's advice.  But you can buy these products in other places too.

Apparently you have to be careful about what type of paint you put on top and what underneath.  Here's the deal:  enamel does not breathe.  Lacquer does.  This means that you can put lacquer paints on top of enamel paints (the original japanned finish on the old black machines is a type of enamel), but you CANNOT put enamel on top of lacquer. Not if you want it to stay on, that is.  If lacquer is underneath enamel, it will develop air bubbles and pop the enamel off.

Actually he called the modern lacquer "fake" to distinguish it from vintage lacquer.  Gotta love talking to another vintage buff.


Start with a self-etching primer.  He told me that this eats its way into the metal to bond with it, so you don't have to sand before applying the primer.  (I had already sanded at the end of the stripping phase just to be sure I got all the gunk off).


Link to the self-etching primer.  $7 and it would probably do 2-3 machines.


It's a muddy greenish brown, matte.  but none of that matters because it is just the bottom coat.


Not really a different color than above.  Just photo-enhanced to show details.

There is a video online about painting a Singer 201, and that person uses body filler to get the surface smooth.  I skipped that step because it looked pretty good to me.  UNTIL I got the primer on, then every imperfection leaped out at me.  If I were doing this again I would definitely NOT skip the body filler.  Learning this stuff is all part of the process.  I attacked the worst of the imperfections with an aluminum oxide bit on my Dremel and then primed those spots again.

Then you sand to get the surface very smooth.  He recommended 400 grit wet sandpaper to start with, followed up with 1000 grit wet.  He spoke again about the level of perfection required for NASCAR race cars.  I skipped the 1000 grit step and that worked out just fine.  One reason it worked out OK is that the sparkly paint I used has a texture to it.  If I were doing a glossy finish I would probably go with the 1000 grit.


I asked him about using a tack cloth and he said he does not bother.  Instead he wipes down with this product, which will remove the grit and any oil on the machine that has come from your hands.


Link to Rust-Oleum Wax & Tar Remover  $7.50 and it should last me for a couple of years.


He had three colors of super sparkly paint, blue, red and silver.  (An online search shows that it is also made in green and copper colors.)  He told me that to get it the sparkliest, I should use silver first and then follow with the color ( I chose the blue).


Link to Dupli-Color Metal Specks, silver.  $12 and I did not use the whole can.  If I were doing it again I would use flat silver for the base coat rather than the sparkly silver.  This would save some money.


There are a few tricks to spray painting.  I love spray painting so I have had plenty of practice.

  • Tip #1:  Many light coats, don't even THINK about covering it completely the first time.  Read the can about re-coat times.  
  • Tip #2:  Spray across the piece but start before the piece and end after it.  To make that clearer, and based on the photo below, start spraying about where the paint can is and finish about where the right hand side of the photo is.


There is no way a photo can capture the extreme sparkliness of this machine.

Oh.  My.  Gosh.   It is flat out gorgeous.  I was sorely tempted to stop with this color.  For one thing, the decals will be printed on clear waterslide decal "paper" and the silver would show the colors the most accurately.  In fact I paused here for quite a long time while I looked for just the right images.  I had to find those first before deciding whether to leave it silver or proceed with the blue.  More about image selection and decal creation in the next post.

In the end, I went with the blue.  What pushed me over the edge was the fact that this is a learning project.  I need to know how the blue color will show through the decals.


Link to Dupli-Color Metal Specks, Ocean Blue.  $12 and although there is some left over I have no way of knowing if it would be enough to do another machine.


I asked him if it was necessary to sand between the coats of paint.  His opinion:  if you are painting a NASCAR race car, then yes.  Maybe several coats with sanding in between.  For this project, he said it would not be necessary.


Amost finished.  One more coat after this one.

That was his advice, but the sparkles in this particular type of paint fly off into the air and land on the machine (it is a truly magical effect in the bright sunlight).  I did lightly wet sand with 400 grit before the final coat, and then wiped it down with the wax & tar remover shown above.

5 sheets of 400 grit wet or dry sandpaper, $8.  I only used one sheet for this, and another one in shining up the metal parts.


What looks like dandruff in the photo are actually tiny metallic sparkles.
I think I am in love.  If you have been thinking about doing something like this, let me tell you that it is really, really easy.  Not quick, not cheap, but easy.  You do have to be comfortable with taking off and replacing the handwheel, bobbin winder and tensioner.  Everything else a ten-year-old could do.  A ten-year-old with terrible parents who let them play with toxic chemicals, that is.  And the chemicals are really not that bad.  Mr. Auto Zone Manager did stress the need for a face mask (the cheap disposable paper kind) and gloves.  I did use the gloves when I was stripping off the paint.

After painting I will apply the decals.  The final step is a clear coat and here is where you have to be careful to get a lacquer clear coat instead of an enamel clear coat.  He warned me that this goes on cloudy, but assured me that it dries clear.

,
Link to Rust-Oleum Acrylic Lacquer Clear Coat.  $6, I did not use the whole can but don't really know how much is left over.

I asked him if it was necessary to sand between and after the clear coats.  His opinion:  if you are painting a NASCAR race car, then yes.  Again, several coats with sanding in between.  For this project, then no.


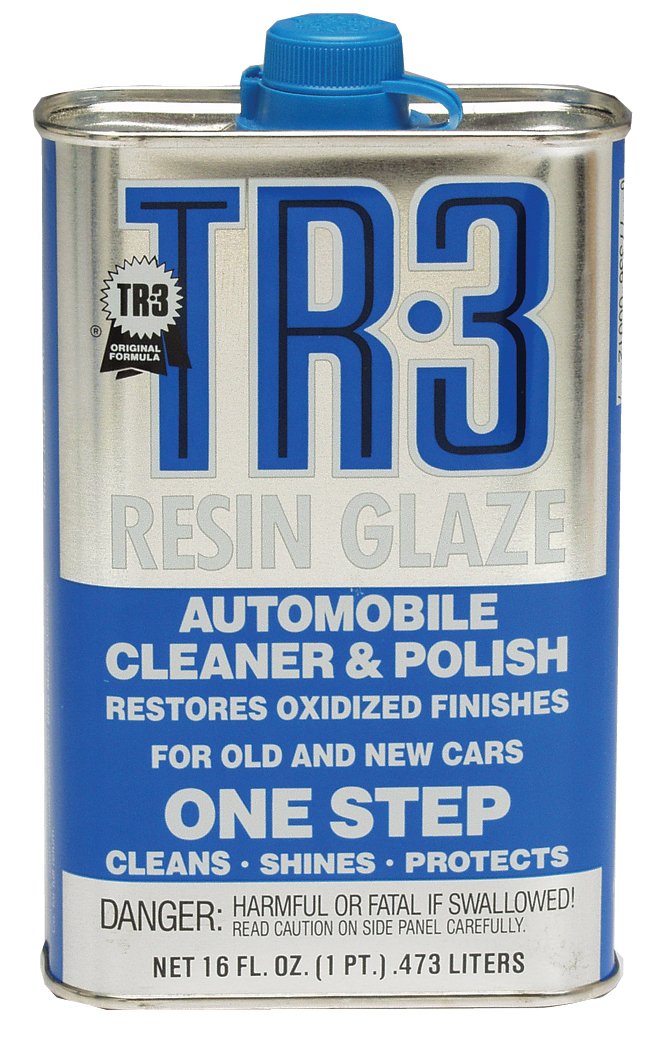
He did recommend doing something at the end.  I don't remember exactly what he said but it sounded like TR3.  He was not familiar with that exact product (Auto Zone does not carry it) but said it sounded like what he was recommending, which is a type of polish with a VERY fine grit to it, fine as in talcum powder fine.   I never thought of TR-3 that way, but it makes sense.   So I will finish up with that as I usually do,


Link to Blue Magic TR3 Auto Resin Glaze.  $10 and one can will last for many machines.


The next post in this saga will cover the creation and application of the decals.  I explained the whole process when I was working on Shield Maiden. The decals on this machine will be in color, but the products and processes will be the same.

It will probably be about two weeks before you see the final finished product, decals and all.  Please try to restrain your excitement until then!

Two weeks!  ha ha ha ha ha.  I'm still puttering with it almost two months later.

Total expenditure so far is about $80, but I have lots of products left over for the future.  This is my major hobby so this stuff will get used in the future.

Sunday, June 1, 2014

Stripping the Paint from a Singer 27


Every once in a while it is a good idea for me to remind my readers of what an expert I am NOT.

This is just a hobby and I do things just for fun.  Curiosity is fun, experimenting is fun.  Blogging is fun.  None of this makes me an expert.

There was a thread on one of the boards a while back about do it yourself decals.  I got curious, experimented, and Shield Maiden was born.  Or rather, had a facelift.


But I was still curious.  I want to paint sewing machines in other pretty colors.  I want to make beautiful colored decals.  And I want to experiment with black decals on black machines, with a bit of gold paint peaking out from underneath to mimic gold decals.

This particular project was originally intended to be black-on-black with gold underneath.   It began with a 1900 Singer 27 Sphinx, 25% of the decals silvered and another 25% completely gone.  I was going to just lightly sand off the old decals, touch up the paint chips and then proceed to the decals.   But the whole project took an unexpected turn.

First I spent hours cleaning the dratted thing.

This is a horribly messy smelly job.  After 114 years the layers of dirt and grime are always impressive.  If you have nicotine sensitivity this is not a job for you.  Here in the North Carolina tobacco was the backbone of the economy for most of those years, and people took pride in it and considered it their civic responsibility to smoke cigarettes.  Think I am kidding?  Think again.

Are all antique machines and treadles in Wisconsin coated in nicotine?  I really would like to know.

THE CLEANING METHOD DESCRIBED HERE DESTROY DECALS.  But since I was trying to take it down to the black paint anyway, that didn't matter.


I used Tuff Stuff, a spray on foam cleaner.  It sprays on as white foam, begins to melt and drip, and turns brown as it picks up dirt.


I scrub with an old toothbrush and then wipe a layer of dirt away.  Repeat, repeat, repeat, repeat. And then probably repeat some more.


 I do this in a metal pan and all the melted Tuff Stuff collects in the bottom and reeks of nicotine.  Lovely job, not for the fainthearted.


I usually only use Tuff Stuff on the underneath side of sewing machines, and take care to keep it off the decals.  It does a really great job of removing many decades of dirt and sewing machine oil.

So, I got it all clean and then started sanding off the old decals.

Whoops.  Here's where again I point out to you my lack of expertise.

I had recently sanded decals off of a black Singer 301 and replaced them.  That worked very well.  This didn't.   This machine was much older and had that thick japanned painted surface which was much softer.  I got down to bits of bare metal peeking though in just a few strokes.

Total change of plan.  I WAS going to just sand off the decals, touch up the paint chips with a black Sharpie paint marker and take it from there.  Not going to work.  The new plan: take all of the paint off.

This means that all of the hours I spent cleaning and toothbrush-scrubbing with the Tuff Stuff were wasted, btw.  But I also spent them catching up on Dr. Who, so not totally wasted.  That River Song---what a woman!


So I got out the Citra Solv.  My friend and fellow treadle addict Myra recommended it to me for furniture, and I used it recently to take the old finish off of a couple of cabinets.  It smells nice and makes some non-toxic claims, at the same time recommending that you wear chemical resistant gloves to apply it.  I used the thin medical latex gloves and had to keep replacing them as the fingers blew out.


You paint it on and then wait while it works--anywhere from an hour to 24 hours.  I let it sit overnight on the first pass.


I used a vintage trowel from my grandfather's tool box to scrape of the paint.  Two flat sides and a point, all useful.  Gooped it up again, scraped some more, then used a wire brush shaped kind of like a toothbrush.  More Dr. Who.  Now I know who River Song really is.  Wowzer.


And if the Tuff Stuff treatment was messy, removing the paint was horrendously messy.  In a kind of fun way.  There is also the added thrill of doing something that you just KNOW that some people will disapprove of.  There are flame wars going on over on Facebook over just this kind of thing.  I keep out of them.

After the final clean up to get all of the gunk off, I also sanded the surface with the 220 grit dry sandpaper.  It felt smooth to the touch after that.


Last step before the painting process is to tape over all of the openings.


The tiny holes are filled in with the stems from a wooden q-tip, wrapped with painters tape until they are the right size.  BTW,  they kept falling out and I had to be careful to replace them before each spray of paint.  You don't want paint in the screw threads!


The holes for the cabinet posts were larger, and some folded up pipe cleaners worked to block those openings.

Having gone to all this time and trouble to get the machine naked, there was NO WAY I was going to paint this puppy boring black.  Time to experiment with automotive spray paint in a jazzy color.  Out the window goes the original plan to recreate gold decals on a black machine.  I'll do that later though.  This year appears to be the year of painting experiments.

All of these experiments with stripping, painting, decals, clear coat have an ultimate goal.  I've got a Featherweight that is crying out for new paint job and I don't want to spend $500 and send it off to be painted.  I think $500 is a TOTALLY reasonable charge, btw, when you consider the labor involved.  For me the fun is in the experimenting.

Stay tuned for the next thrilling installment!