80% of the time you spend on a paint job should be spent in prepping the surface to receive (and ultimately to hold on to) the paint. And yes, this should NOT take 7 months. but whatever, here we finally are.
If you are just joining us, take a look at the earlier posts on preparation.
Paint Along. How It Works.
Hammered paint is a VERY different beast than regular oil based paint and requires some specific techniques. So read the whole post before opening that can of paint, please.
And start by reading the fine print on the paint can AND BELIEVING IT. Trust me, it can all go horribly wrong if you don't.
But don't let any of these warnings scare you. If you follow along, the paint will go on quickly (it HAS to go on quickly as you will see) and pretty easily. Mistakes are fixable, and indeed on the first two coats mistakes won't really matter. And the reason I recommend hammered paint for a first sewing machine painting experience is that it will cover a multitude of sins, ahem, chips and flaws.
I interviewed a friend with 43 years experience in the paint industry, and although I will publish that interview soon, today I am just going to thread his advice into this post.
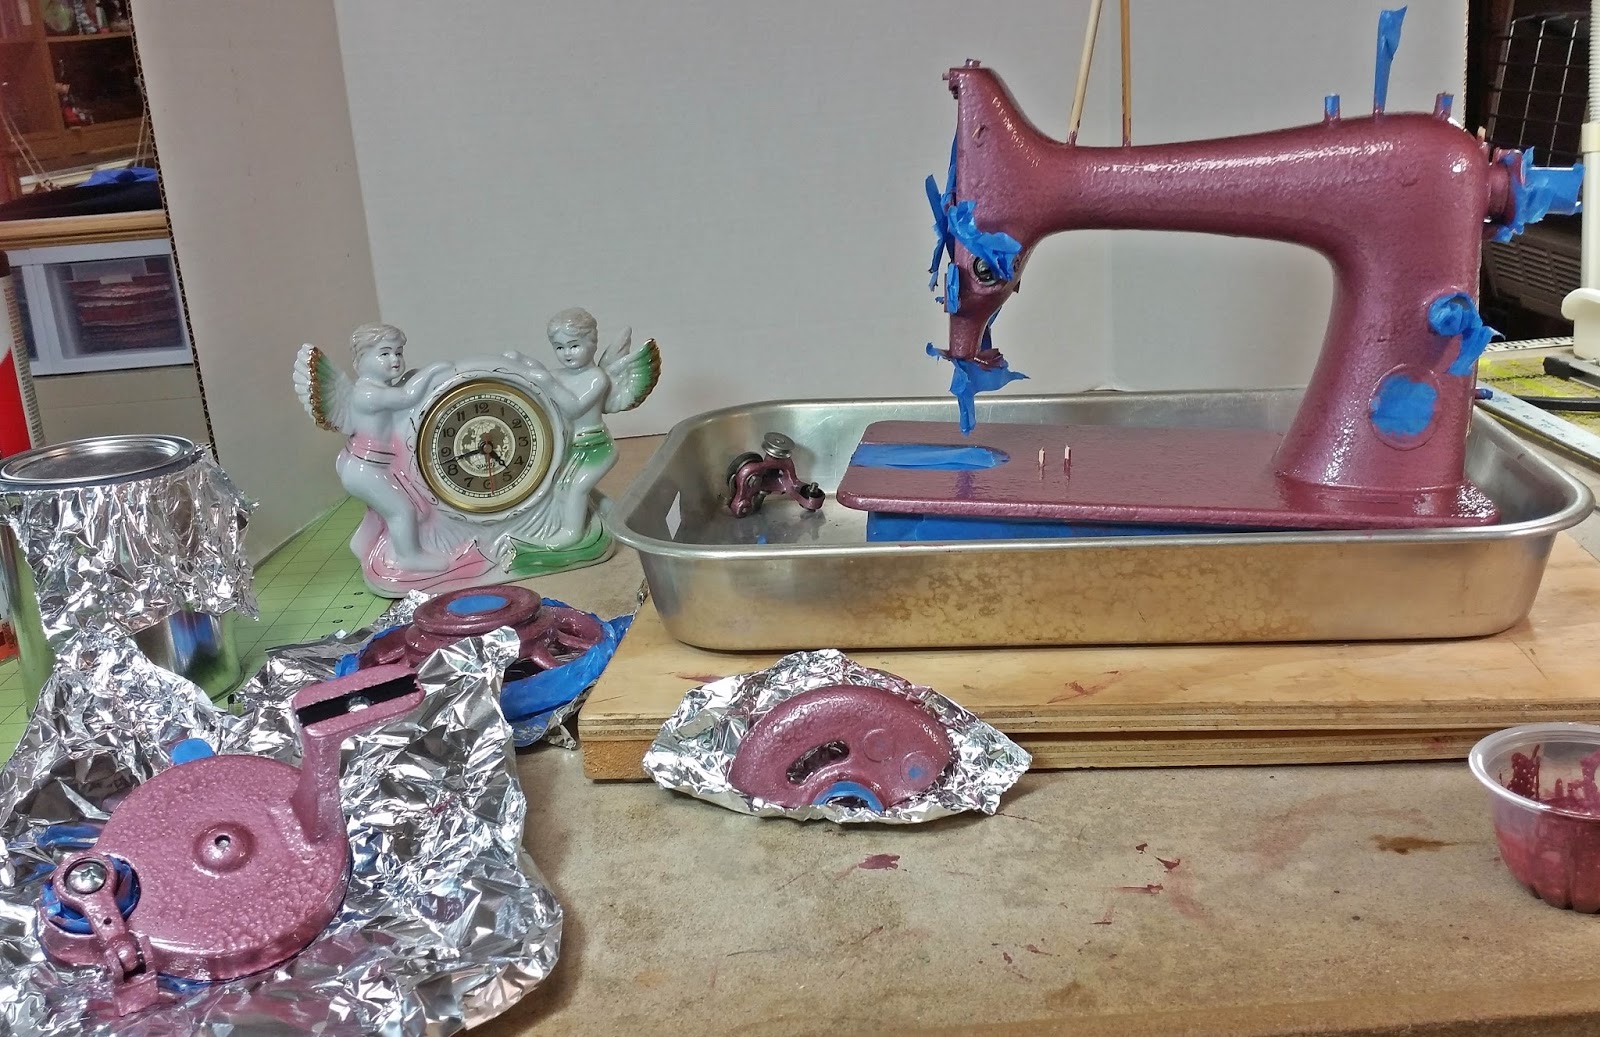
Assemble your supplies

- Paint. I will experiment with three colors: red and light blue Hammerite, and silver hammered Rustoleum.
- if you are mixing colors you will also need a pallette on which to mix. I used an aluminum stove burner cover. I tend to turn the wrong burner on and crisp them, so I used one of those.
- Paintbrushes. I used one small one and one tiny one
- Xylene. NOTHING else will do. I could only find it in a gallon can, which if I remember correctly cost about $20.

- an empty paint can (necessary only if you are mixing colors).
- an empty tin can
- some empty disposable small containers like yogurt cups, or fruit cups
- glass of Southern sweet tea is optional!

and even more
- Rustoleum wax and tar remover. Probably not necessary if you move straight on from the earlier cleaning and sanding prep, but my machine had been sitting around for months and I felt it needed another wipe down before I began
 |
| and it did need the additional wipe down |
- paint stirrers
- and that thingy that opens paint cans
- aluminum foil (not shown in photos above)
"Witch Doctoring" and Paint Mixing
My friend the paint guru says that experimenting with mixing paints is called witch doctoring in the industry. He stressed the importance of experimentation before beginning. REALLY stressed it.

I ordered the paint online and it came with little clamps on the top. pop those off and throw them away. Yes, I AM going to go into this much detail. So maybe you will need that glass of sweet tea after all.

I hate messy paint cans and it really is necessary for the can to seal tightly when you are finished. So I made some covers out of aluminum foil to keep the top edges of the can clean.

Stir. Stir. Stir. Stir. Then stir some more. Unless you just brought it home from the giant paint stirring machine at the paint store.

and below are my three stirred cans, with the lids sitting loosely back on the top. This paint dries VERY quickly and you need to protect it from evaporating and thickening in the can.

I used the paint on the paint stirrers to drip some paint onto my stove-burner-cover-pallette.

And then used bamboo skewers to mix the colors.

I was hoping for purple. The color you can see in the photo looks a lot better than it looked in person. In person it had brown tones that were not attractive. But the pink (half red Hammerite and half silver hammered Rustoleum) turned out very well.

I also tried mixing the red with artist's oil paint to get purple, but the amount of artist's oil needed would have been ridiculous, and I also assume (without confirming) that it would have changed the characteristics of the hammered paint.

I have not tried mixing hammered with regular oil based paint for the same reason. But that does not mean that you should not witch doctor some up. If you do, send photos please, whether it worked or not.

and I slapped a sample on the back of the pillar

I also slapped on a sample of the light blue, which was pretty. But Nellie has asked for pink or purple.


So I liked the pink and the proportions were simple: half red and half silver. I used a couple of coffee scoops (because I had a surplus of those) to transfer about half a cup of each color into the empty paint can. I knew from experience that this would be PLENTY to paint one sewing machine. It might, in fact, cover two. Stir, stir, stir.
NOW HERE IS THE IMPORTANT STUFF ABOUT THE HAMMERED PAINT
Xylene is hugely toxic, not to mention explosive. Mr. Paint Guru compared it to jet fuel.
- YOU MUST HAVE GOOD VENTILATION
- outdoors is best, but the two windows with a strong fan and cross ventilation in my studio was approved by Mr. Paint Guru
- YOU MUST NOT HAVE ANY OPEN FLAMES IN THE AREA
These things are non-negotiable.
Paint consists of pigment and a medium that carries it. Hammered paint medium contains xylene (or something very similar) which dries VERY VERY QUICKLY. You will have to battle this constantly while you work.
As you work, the paint will begin to dry on your paint brush. If you allow this to happen you will get bits of dried paint showing up on the surface of your machine. The technical term for the dried bits is "boogers". I am not making this up. Boogers, as you can imagine, are BAD.
So how do you prevent booger formation?
First of all, don't work from your can of paint. Instead, transfer a small amount (like one coffee scoop) into one of your small fruit cups (or whatever small container you are using) and then put the lid back on the paint can immediately.
Take a small can (I used a tomato paste can), put a couple of tablespoons of xylene in the bottom of it and add a lid of aluminum foil

Before you start painting dip your brush into the xylene and brush the excess xylene off on the side of the can.
As you paint, dip your painty brush back into the xylene briefly from time to time. I can't give you a formula for this. The paint in the fruit cup is going to be drying and thickening just like the paint on the brush. The xylene is going to thin the paint. You are shooting for keeping the paint at the same consistency as you go along. Too thick and you will start to get boogers. Too thin and the paint will not be thick enough to cover up the chips in the bed of the original paint (if you have those).
And if you do get a booger, dip the brush in the xylene and slap it on the booger, which will probably melt down. Obvious drips can be treated the same way.
With all this in mind
Slap The First Coat of Paint On Quickly
And because I did, I don't have any pictures of this during the process. I used a tiny brush to paint around the plugged up holes and a slightly larger brush for the rest of it.
The tiny brush had a plastic handle and I noticed that the xylene was melting it. The slightly larger brush had a painted wooden handle and that survived just fine.
Mr. Paint Guru rcommends thinning the first coat a bit. Again, no formula, but to the coffee scoop amount I probably added about a teaspoon.
THE FIRST COAT IS GOING TO LOOK TERRIBLE. Don't worry about this.

The photos do not do justice to the terrible appearance of coat number one.


But in this close up of the bobbin winder you can see how spotty the first coat will look.

When you are finished with the first coat, DO NOT pour the leftovers back into the paint can. Remember, this first coat was thinned down, and you don't want to thin down the paint in the can. Also, the paint along the edges of the fruit cup are thick and boogery. So, set that first cup aside for now (we will talk about disposal later).
Follow the directions on the can for the timing of applying the second coat. I'm not going to tell you what it is because I want you to read those directions! Basically you wait until the first coat is dry to the touch but still pliable, and you have a limited amount of time to add the second coat. Take all of this very seriously. Don't wait until the next day for instance.
Slap The Second Coat of Paint On Quickly
Get another fruit cup. Put another coffee scoop of paint into it and don't thin it down. But you will still have to keep your brush wet with the xylene as you did with the first coat.
Same techniques as for first coat. And although the second coat will look better, it will still not look terrific. DO NOT WORRY ABOUT THIS.

Again, the photos look better than reality. But if you look closely at the picture of the bed below, you will see little gaps where the original black is showing through.

I also painted the hand wheel, hand wheel guard, and reproduction hand crank.
After this second, full strength coat goes on, the small chips in the underlying paint job should be covered by the texture of the hammered paint.
Now I WILL tell you what to do between coat #2 and coat #3. Wait a FULL WEEK. Again, take this seriously. In the upcoming interview with Mr. Paint Guru he will discuss what happens during this time while the paint is curing. For now, just wait.
Put the lids back on your paint cans and use a small hammer to securely close them.
Disposal
You can clean the brushes or just throw them away. I cleaned mine with the xylene in the tomato paste can and wiped them off on paper shop towels (a particularly heavy paper towel).
This means that you have several things to throw away
- the xylene-y paper towels
- the xylene in the tomato paste can
- the palette
- the coffee scoops, or whatever you used to scoop the paint out of the original cans
- the fruit cups, or whatever you used
The only thing you will end up saving (and only if you really want to) is the tomato paste tin can.
Paper or cloth towels soaked with toxic and explosive chemicals WILL IGNITE ON THEIR OWN as chemical processes take place. I've seen the videos of this.
It is probably illegal and almost certainly a very environmentally unfriendly thing to do to toss the remaining 2 tablespoons of xylene in the tomato paste can out onto your back lawn. So I am NOT going to confess to doing this. Figure it out for yourself.
The xylene evaporated very quickly from the paper towels however. I bagged all the refuse in a plastic bag, squeezed the air out of the bag, tied it off, and immediately took it to the outside trash can Where it did not spontaneously combust nor burn my house down.
Now just wait. Really. Don't try to cheat. Wait the full week for the paint to cure.
See you next week for the final coats of paint. I have done this and taken the photos already, so there is an excellent chance that I will get that post up in a very timely fashion.
And after the third coat goes on, wait at least another week for the paint to cure! Ask me how I know... Let's just say there was some repainting involved. This time (my second repaint) I waited a full month after the 3rd coat!
ReplyDeleteThanks and I will add your comment to the next post as a dire warning!
DeleteHi Cheryl, I just love the pink you achieved with red and silver. Perfect for a 99 for a little girl. Thank you for all the tips with the hammered paint, now I need to find some small scoops.
ReplyDeleteThanks! I love your blue machine that I saw online. do you have any photos of the painting process that you would be willing to share?
Delete