 |
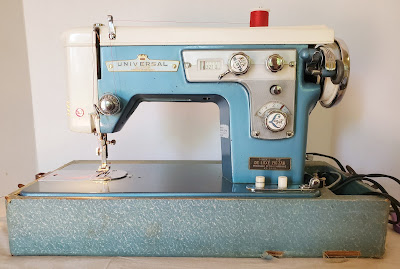
I have another all metal vintage sewing machine for sale on my local
Craigslist. You can see the ad here, and it will disappear when the
machine is sold. It is a high shank machine with a left homing needle, and it takes class 15 needles. It comes with a set of high shank presser feet, shown at the end of this blog post.
 |

The brand name "Universal" is not the manufacturer, it's just a name. The crown on the logo makes me think that it was manufactured by Toyota but I don't know that for sure.
I do not have the manual for this machine but I can email the seller a generic manual for zigzag machines. Because there is no manual I have used this blog to show the controls and the thread path for this specific machine. Read on for that!

It comes in the usual style vintage case.
 |
With the usual assortment of dings and scrapes accumulated over the last 50 years or so. If you want to upgrade, it should fit in a standard modern plastic sewing machine case, available online.

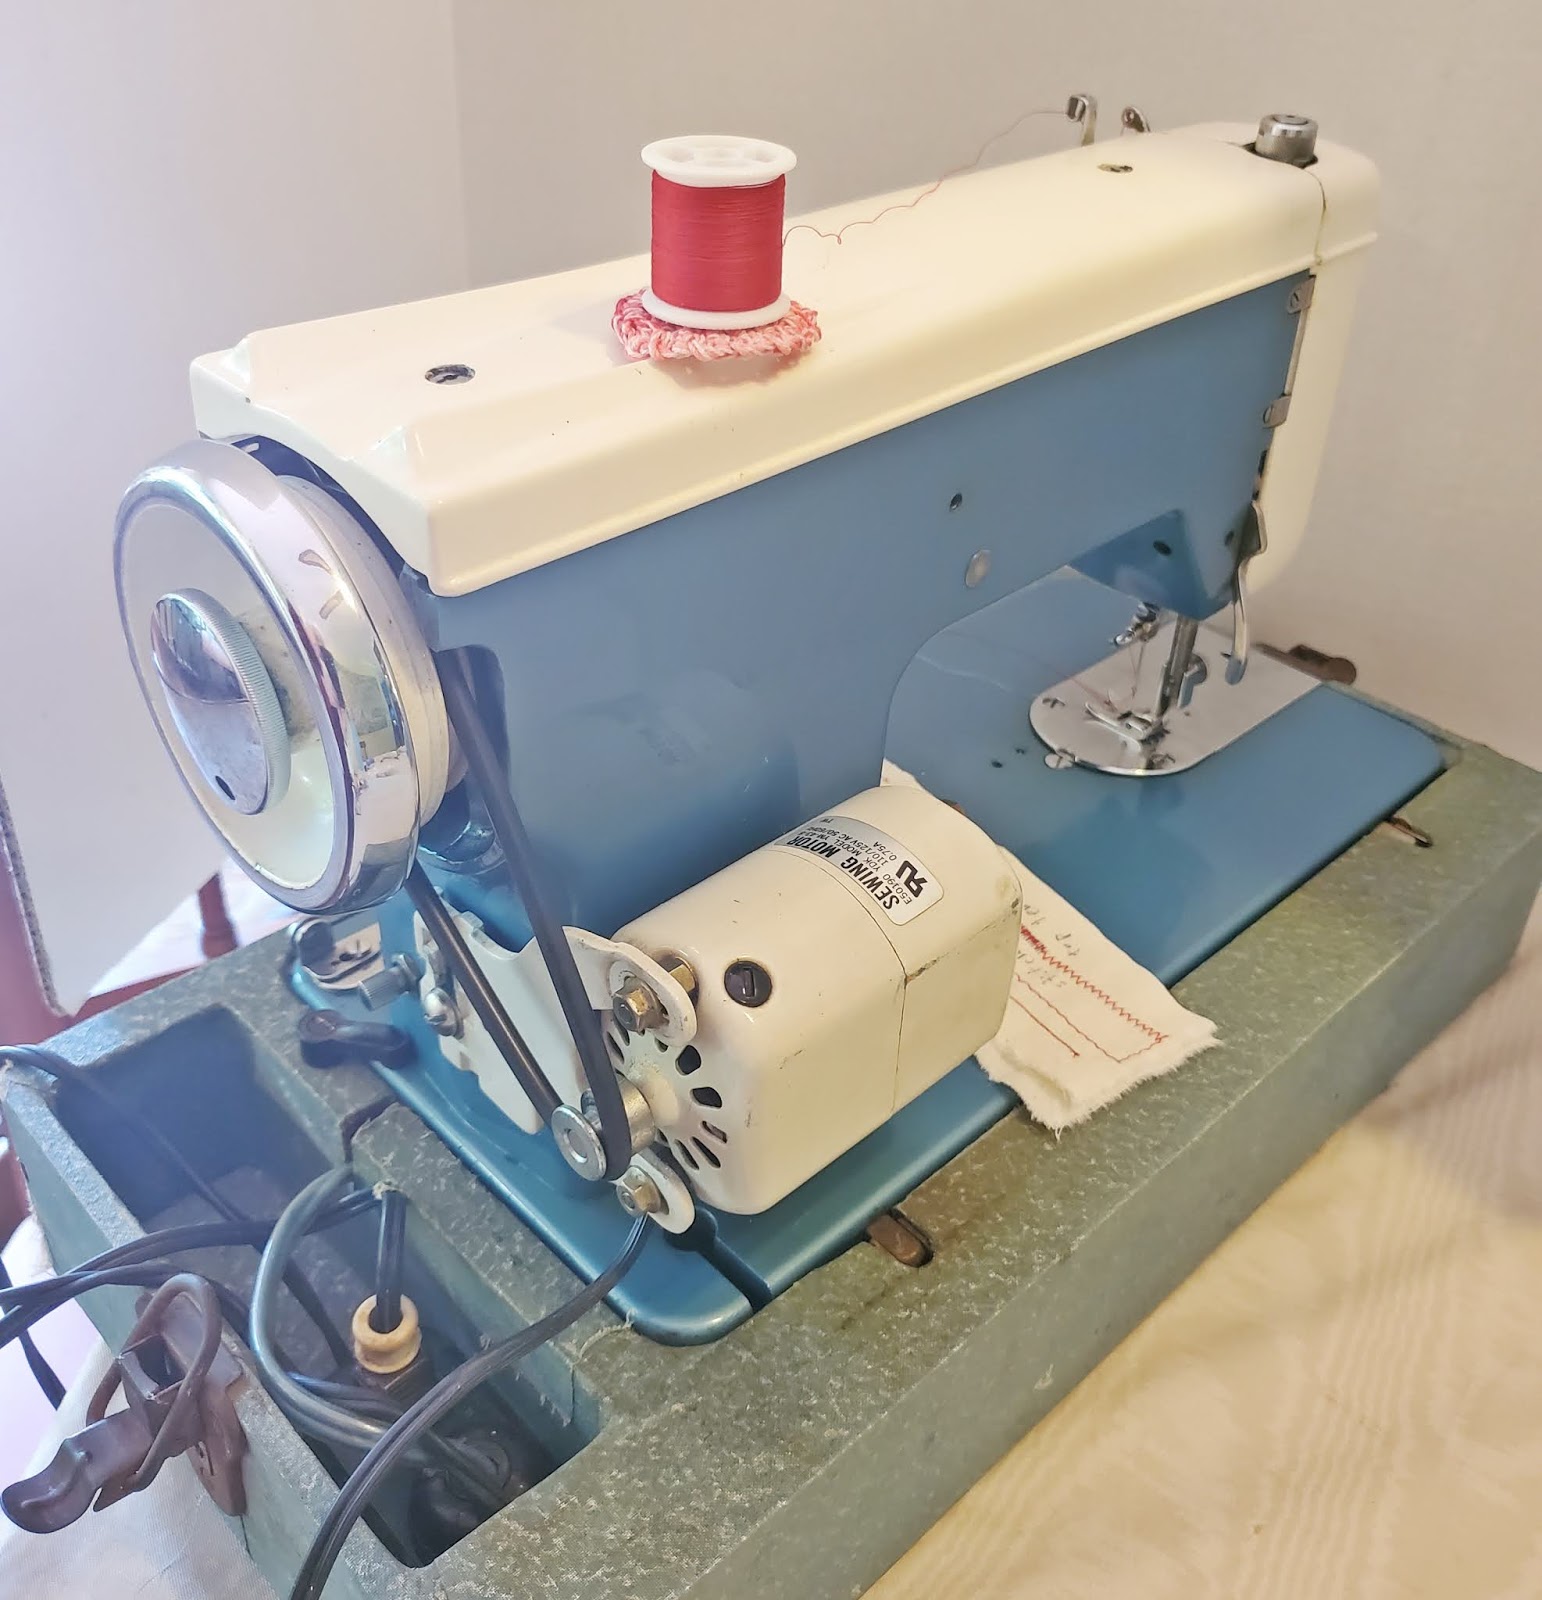
I cleaned it, oiled and lubed it, and checked all of the features.

I don't know how well this shows in the photo but stitch length and width work. The tensioner also works. The photo shows what happens if it is loosened and then tightened properly.

The reverse stitch works. You will be able to examine these stitch samples for yourself if you come to see this machine, and test it yourself on my front porch (weather permitting).
 |
| Bobbin winder not engaged. |
In the photo below the bobbin winder IS pressed against the hand wheel. The bobbin winder spins and winds the bobbin. The latch releases automatically when the bobbin is full.

With this or any machine, if the bobbin winds unevenly you can guide it with your finger. I adjusted it a bit after this photo was taken and it is working well but not perfectly. So keep an eye on it as it winds and shift the thread a bit from side to side as necessary.

The control are simple and easy to use.

The dial shown below controls the stitch length. Push in the button above it to create a reverse stitch.

For both the stitch width and the stitch length you have continuous control, meaning that you can set it anywhere between 1 and 4. For example, just a smidge wider than 2, 2-1/2, 2-3/4, etc. anywhere along the dial. You don't get that kind of control with a modern machine.
The dial in the middle shown below allows you to set the stitch width. Turn the knob to lock it into place.

Three presser foot positions
One unusual feature of the machine is that the presser foot has three positions |
| Position 1: All the way up |
 |
| Position 2: Hovering a bit |
 |
| Position 3: All the way down |
Position 3 is the usual one where the presser foot is all the way down and holding the work in place under the presser foot. Keep in mind that you need to move the foot all the way down to this position. If you only put the foot down part way into position 2 the fabric won't feed. Making this mistake is how I discovered this feature of the machine.
Thread Path
I'm not going to show the bobbin threading because the generic manual does a fine job of that. Top threading is also pretty standard as you discover if you work with many machines. But most people are not vintage sewing machine addicts and only work with one machine. So I will show you the steps to threading this particular machine through the pictures below.


Bobbin Cover and Needle Plate
One of the things I like about this machine is the way the bobbin cover and needle plate work.
 |
| Bobbin cover and needle plate |
 |
| The bobbin covers slides very easily. Not true of all machines! |
 |
| The needle plate LOOKS like it is screwed down as most are, but it is not. It lifts easily. |
 |
| Needle plate slides off |
 |
| Here the needle plate is removed completely. |
 |
| The presser feet are stored in a vintage plastic box |
This
machine is a high shank machine, which describes the way that the
presser feet attach.
If you need presser feet other than the ones included with the
machine, you need to be sure to look for “high shank” feet. The
good news is that most modern industrial machines use high shank feet
and there are literally hundreds of types available. There are
adapters available on eBay in the $5 to $10 range that claim to work
with regular snap-on feet. (I have no experience with them). If you are
interested in snap-on feet I will be glad to provide some at no
additional cost by request.
 |
| These high shank presser feet (and a seam guide) are included |
Most
modern home sewing machines are low shank, which means that presser
feet available at Walmart or Jo-Ann will not fit this machine.
 |
| Presser feet in their storage box |
 |
| Adjustable zipper foot |
If
you are a beginning seamster and wondering how many presser feet you
will need, most people use the zigzag foot and zipper foot and rarely
use any others.
 |
| Straight stitch foot |
If
you are a quilter a straight stitch foot is nice to have.
 |
| Button holder foot |
I'm
quite fond of the button holder foot (also included) which will allow
you to hold a button in place while you use the zigzag stitch to keep
the button from moving while you sew it on.
 |
| Narrow hemmer foot |
There
is a narrow hemmer foot included. These only work with very thin
fabrics, such as were popular for baby clothes, lingerie and
handkerchiefs back in the 1930s. I don't know anyone who uses them and
my opinion is that manufacturers keep including them just to fill up the
attachments box! If you find yourself in need of a hemmer you won't
have any trouble
finding modern ones in larger sizes more useful for the types of fabrics
we sew on today. At the time this was written Amazon had a set of
three sizes for around $10 for the set.
 | ||
| Invisible zipper foot |
Invisible zippers are a special type of zipper that is not visible when sewn. Just as the name says. They require a special presser foot.
I must confess that I have no experience with this foot and had to look it up to determine what it is. It's pretty obvious that you can feed a tiny cord through the foot. If any of my readers have used one, please let us know in the comment section what you use it for!
The seam guide attaches to the bed of the machine and allows you to maintain an even seam width.

Also included with the machine: ten class 15 bobbins in a case, a lint brush, a bottle of sewing machine oil with a brass telescoping spout for pinpoint control, and the two screwdrivers that normally come with a sewing machine as original equipment. The larger one allows you to tighten presser foot screws and other attachments. The tiny one is for adjusting the bobbin case, something that you rarely need to do.
If you decide to buy this machine, or if you already have a Univeral MZ zigzagger of your own, I hope you find this information useful!
 |
| Cording foot |
 |
| Seam guide |

Also included with the machine: ten class 15 bobbins in a case, a lint brush, a bottle of sewing machine oil with a brass telescoping spout for pinpoint control, and the two screwdrivers that normally come with a sewing machine as original equipment. The larger one allows you to tighten presser foot screws and other attachments. The tiny one is for adjusting the bobbin case, something that you rarely need to do.
If you decide to buy this machine, or if you already have a Univeral MZ zigzagger of your own, I hope you find this information useful!
The cord foot allows dinky cording to pass through that slot on the underside of the foot, keeping it lined up with the zigzagging needle stitching over it. I recall my mother using dinky elastic cord with this, I also recall some profanity. I have never had much luck with them (dinky cord not dinky enough and slows down in the slot), but if the presser foot doesn't go all the way to the bed (!!!!!) there might be enough slack to let that cord move through without catching. Still assuming the teddy bear/faux fur/coating argument.
ReplyDeleteI got a little sniffly admiring the upper tension knob and mechanism of this. I do appreciate the adjustable presser foot on my Bernina, but I think this afternoon we'll just pay a little attention to the MiniKennie and take her out for a drive.
Great information, thanks! Yes the hole in cording foot is very tiny. I can imagine nothing thicker than maybe button and carpet thread going through there.
DeleteI'm a MiniKennie fan too.
I think I have that same machine around here somewhere.
ReplyDeleteI just picked up a Universal Model MZ sitting "For Free" at the side of the road in Spring City, PA. It's built like a tank and might be the heaviest sewing machine that I have!
ReplyDeleteHello I have this machine but the brand is White and I’m looking for the tension assembly but I can’t find one that fits for sure, Does somebody knows how to get one online? I tried Amazon but no one mention this brand name
ReplyDelete